

Please note that we do not create all the designs featured in this article. Our primary focus is to curate and collect a diverse range of design collections and products to inspire and share with our audience. While we do not claim ownership or take full credit for the original designs and images, we occasionally make minor adjustments, particularly in home decor and fashion items, to present them more effectively. Additionally, we may produce and edit images to enhance their quality and composition before sharing them on our Pinterest page or website. For the design work we do on these creative designs, we also include our logo on the images shared on Pinterest and our website. This helps our audience recognize that these designs have been published on insiderlyfe.com!
You apply blush in the bathroom mirror, smiling at yourself, right on the round apples of your cheeks. It looks perfect there. Then you step into daylight, relax your face, and the colour has slid down into two flat circles that make you look tired instead of fresh.
That is the most common blush problem, and it is almost never the product. It is blush placement. Colour that sits too low drags the face down, and colour that sits too close to the nose can make it look bigger. Move the same shade an inch higher and outward, and the whole face lifts.
This guide is for anyone who owns a blush they rarely wear, or keeps buying new ones hoping the next will behave. Below are ten warm, toasty looks for the cold months, from peach and terracotta to berry and rosy brown, each with the placement, texture and shade to ask for. After that you will find a face shape map, a cream vs powder vs liquid comparison, an undertone guide, and real products with real prices.
Number 6 is the one that surprises people most: a flush across the nose that looks like you just came in from a cold walk. Keep scrolling.
Blush placement basics: the one minute version
Three rules sit behind every look in this article. First, smile and find the apple of your cheek, then start the colour there and blend up and out, not down and in. Second, stop the colour about two fingers away from the nose and well above the line of your mouth. Third, blend the edge until you cannot find it. A soft edge is what makes blush look like your own skin warming up.
Winter is the best season for this. Pale light and indoor heating can make skin look flat, and a warm flush is the quickest way to bring back life without adding more foundation. If you want the rest of the face to match, our winter makeup looks guide shows how to build the eyes and lips around a flushed cheek.
Cream vs powder vs liquid blush: which to pick
The formula changes how the colour sits, how long it lasts, and how forgiving it is. Here is the short version.
| Formula | Finish | Best for | Watch out for |
|---|---|---|---|
| Cream or balm | Dewy, skin-like | Dry, normal and mature skin; sheer flush | Can slip on oily skin unless set lightly |
| Liquid | Anywhere from dewy to matte | Quick, buildable colour; bare skin or over foundation | Sets fast, so blend within seconds |
| Powder | Matte or soft shimmer | Oily and combination skin; long wear | Can look dusty on dry patches or textured skin |
A rough price guide, based on listings found at the time of writing: Rare Beauty Soft Pinch Liquid Blush is typically $23 in the US and £24 at Space NK in the UK. Glossier Cloud Paint, a gel cream, is typically $20 in the US and £24 at Space NK. Charlotte Tilbury Pillow Talk Matte Beauty Blush Wand (12ml) is typically around $42. For powder, the NARS Blush in 4.8g has a UK list price of £36.50, though retailers often discount it. On a tighter budget, Milani Cheek Kiss Liquid Blush was listed at under $10.
10 toasty blush looks to try this season
Each look below includes where to place it, the formula that works best, and one trick a makeup artist would give you. Mix and match: placement from one look, shade from another.
1. High-placed sweep to the temples
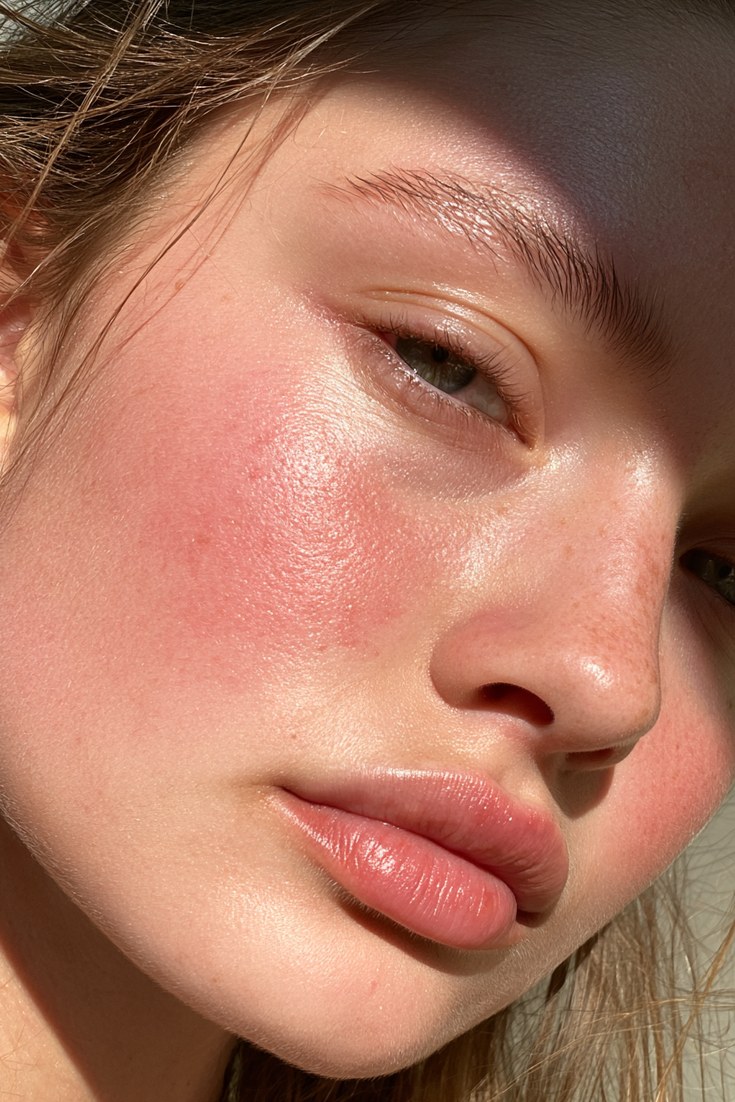
Start with a smile, put the brush on the apple, and drag the colour up and back toward the end of your eyebrow. The result is a lifted, almost sculpted flush that looks like blush and contour in one step.
Ask for a soft rose or warm pink in a matte or satin finish. A fluffy medium brush gives a diffused wash, and a cream applied with a sponge gives a more skin-like glow. Keep the heaviest pigment on the cheekbone and fade it fully by the time it reaches the hairline.
Best for: round and square faces that want more lift. Skip or soften if you have a very long face, since upward colour adds even more length. Pro tip: tap your brush on a tissue before the temple, as that is where people over-blend into a smudge.
2. Cream blush on bare skin
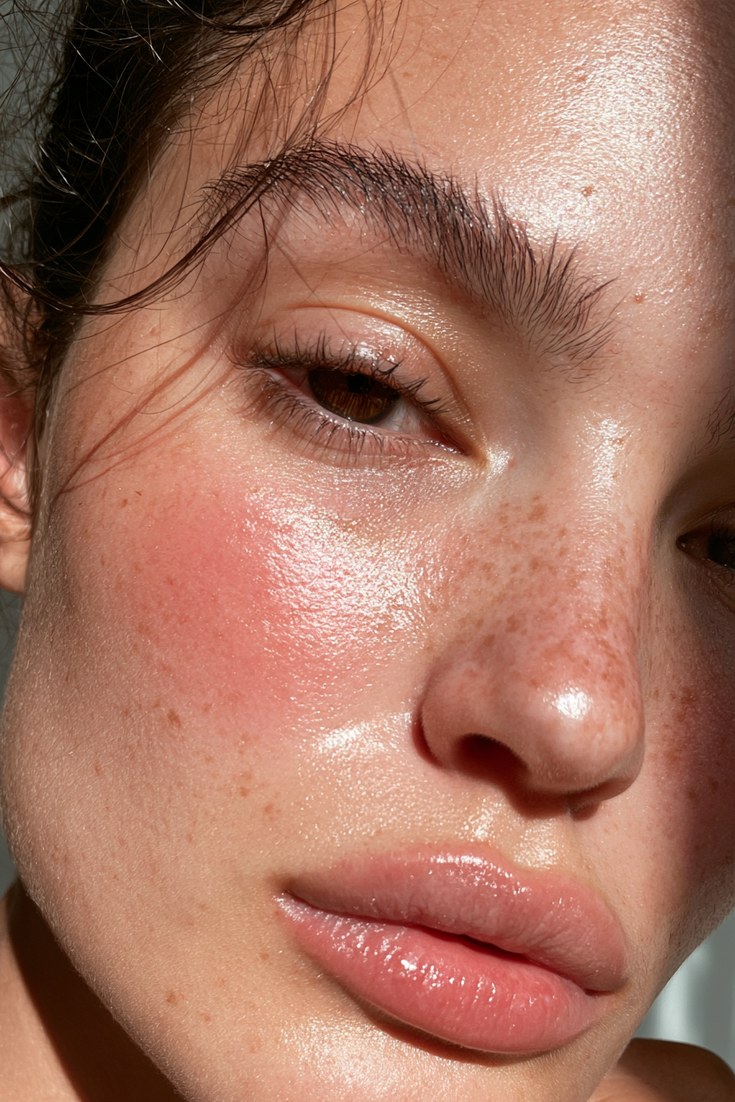
Skip foundation entirely. Dot a cream blush on the apple, tap it out with your ring finger, and let your real skin show through. It takes about thirty seconds and it is the most forgiving look on this list.
Reach for a cream or gel cream such as Glossier Cloud Paint ($20 in the US, £24 at Space NK), or a balm-style stick in a sheer rose or soft peach. Use less than you think: one dot per cheek, then build.
Best for: dry and normal skin, and anyone with freckles you want to keep visible. Skip if you have very oily skin and no setting powder handy, as cream can drift by afternoon. Pro tip: warm the product on the back of your hand first so it melts into skin instead of sitting on top.
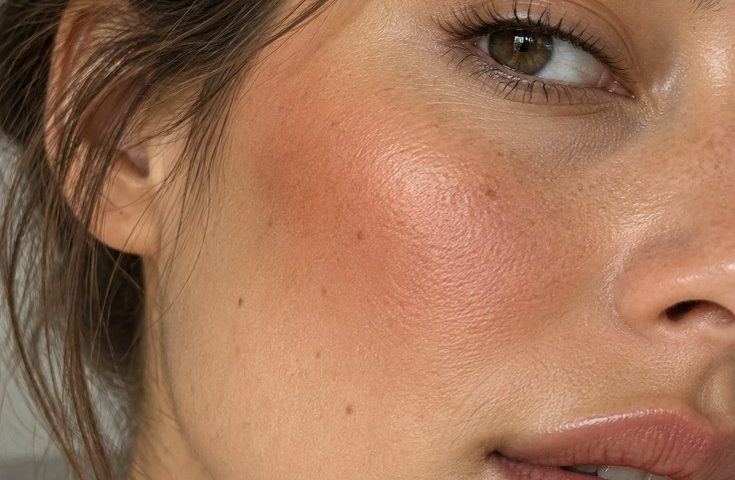
3. Peach-terracotta flush
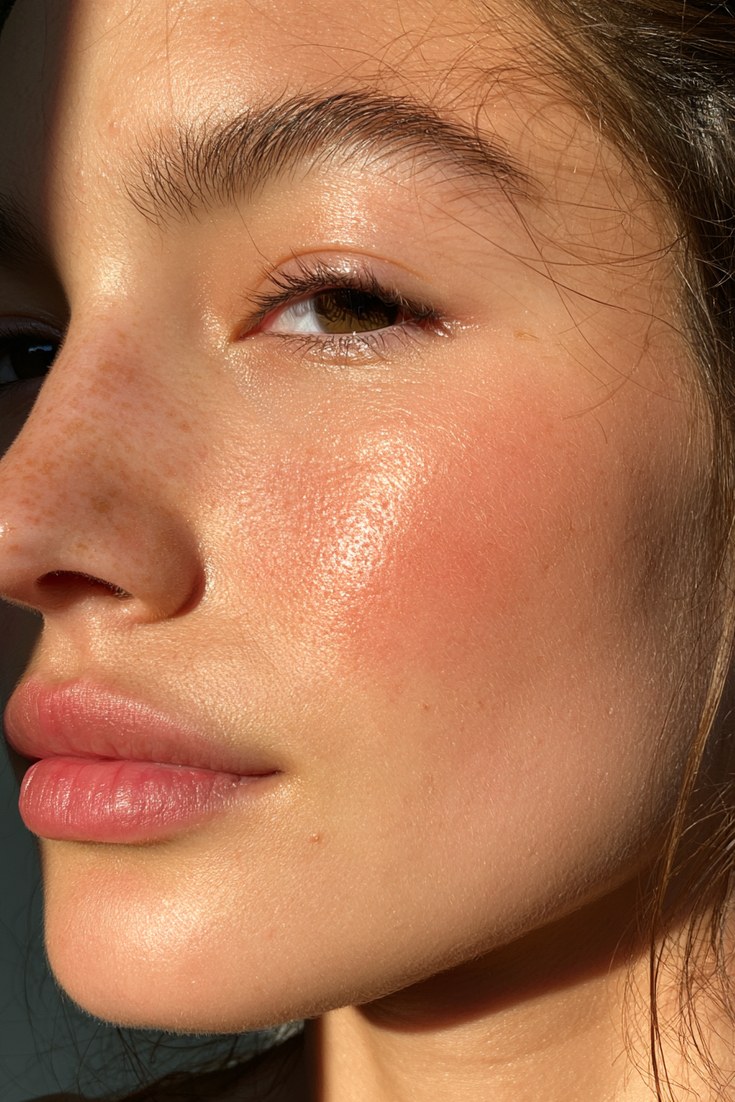
This is the signature warm blush for cold months: a burnt peach that sits between coral and brick. It echoes autumn knitwear and looks especially good with brown or copper eyeshadow.
Ask for a terracotta, burnt peach or warm apricot, in matte for daytime and satin for evening. The NARS Blush in Orgasm Edge (a matte peachy pink) or Orgasm (peachy pink with golden shimmer) sit at the softer, peach end of this family. NARS Blush has a UK list price of £36.50.
Best for: medium, tan and deep skin, and warm or neutral undertones. On very fair skin, mix a little with a pink so it does not turn orange. Pro tip: apply on the top of the cheekbone and blend a little onto the bridge of the nose for a sun-warmed look.
4. Berry cheeks with a soft edge
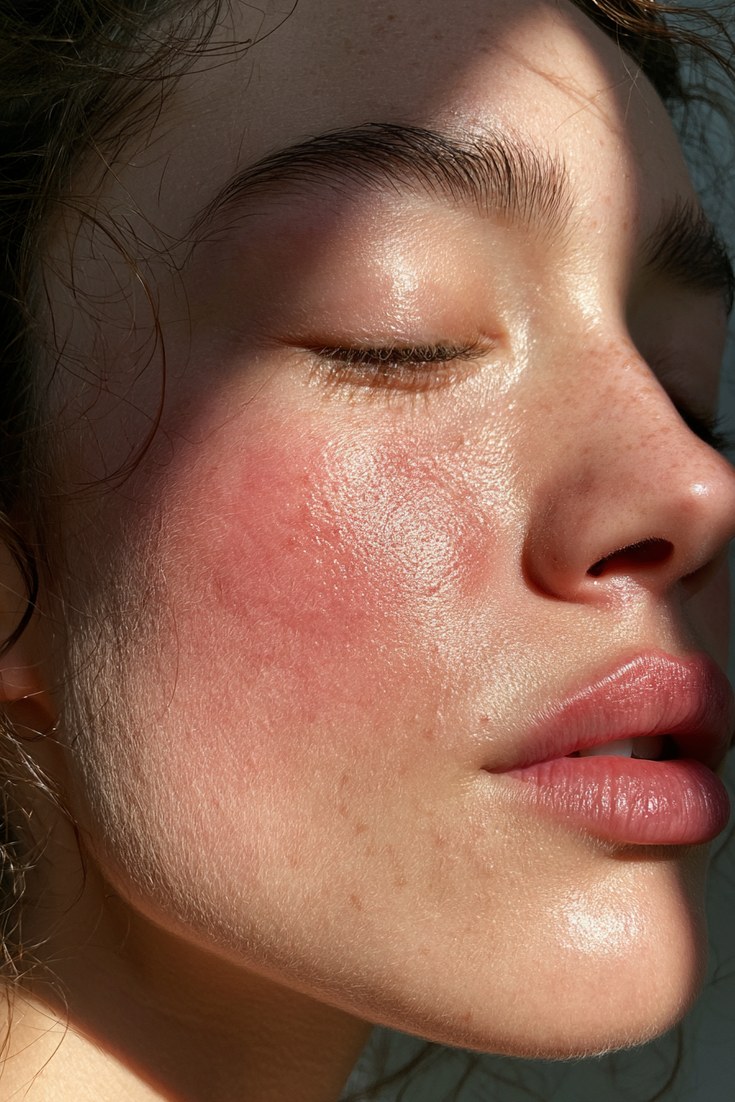
Berry blush reads dramatic in the pan and subtle on the face, if you control the amount. Think wine-stained, not painted.
Ask for a sheer berry, raspberry or plum in a liquid or cream, because you can build it drop by drop. A single dot of Rare Beauty Soft Pinch Liquid Blush (typically $23 or £24) in a deeper shade goes a long way. Pat it in with your fingertips along the cheekbone, then blend the border outward with a clean sponge.
Best for: cool and neutral undertones, and deep skin where berry gives a rich, glossy flush. Pair it with a matching berry lip stain for a tinted-all-over finish, or with burgundy hair for a full wine-toned look. Pro tip: if you worry about overdoing it, apply with a sponge instead of a brush, since it deposits less pigment.
5. Rosy brown, the quiet one
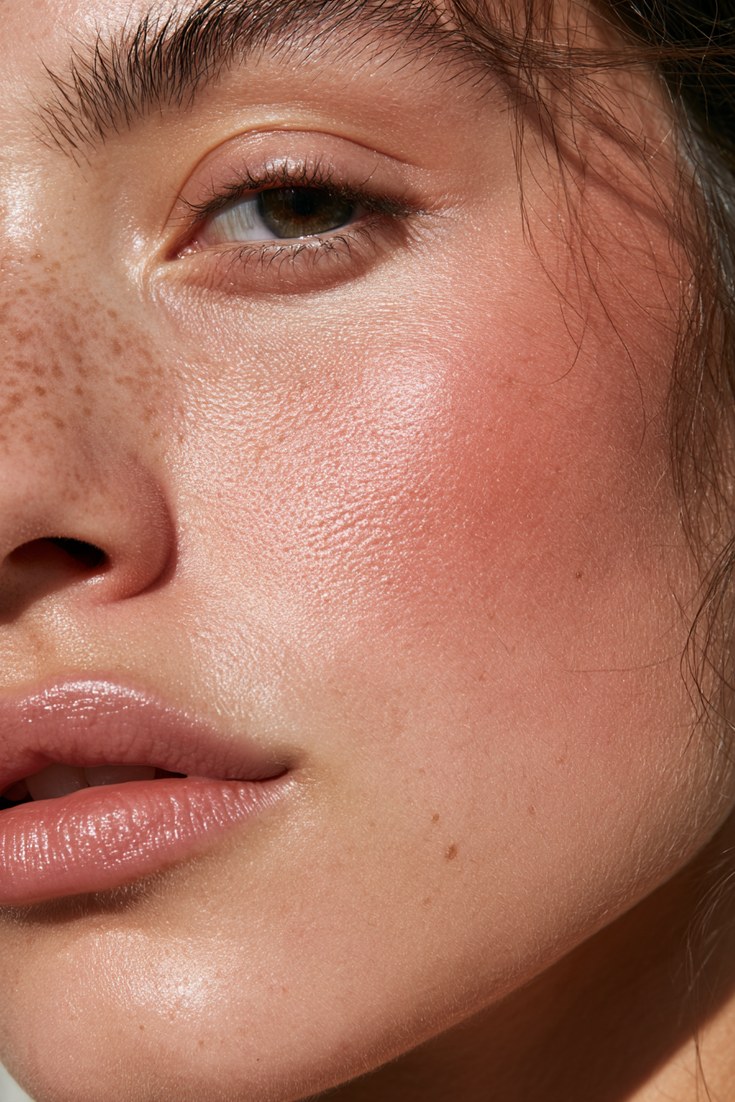
Rosy brown is the shade for people who say they cannot wear blush. It is muted, dusty and closer to a natural flush than anything pink or coral.
Ask for a mauve-brown, dusty rose or soft cocoa in a satin powder or cream. It works as a blush-and-contour hybrid when placed just under the cheekbone, then dusted up over the apple at a lighter pressure.
Best for: medium to deep skin, olive undertones, and anyone going for a soft glam or office look. Skip on very fair skin, where it can look dirty, and pick a rosier version instead. Pro tip: add a tiny amount of highlighter on the tops of the cheekbones so the muted colour glows instead of going flat.
6. Sunburn across the nose
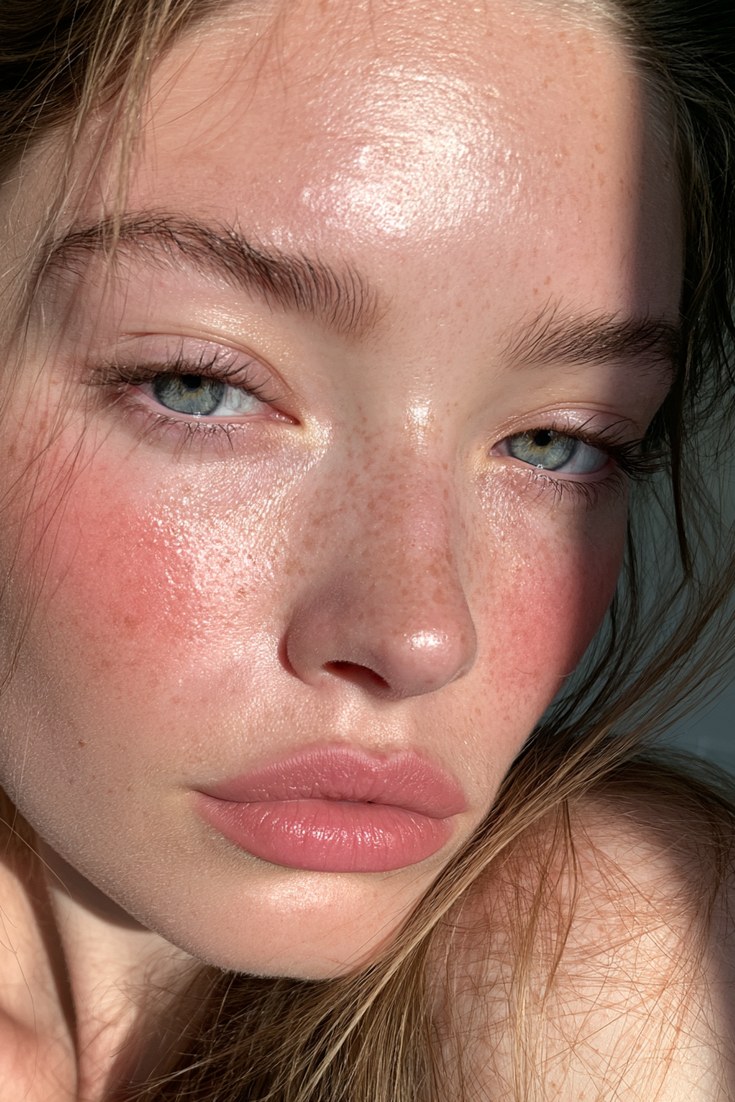
This is the winter-walk flush: a band of colour that sweeps across both cheeks and passes over the bridge of the nose, as if you just came in from the cold. It is playful, youthful and works best with bare or minimal skin.
Ask for a sheer red-pink, rose or soft coral in a liquid or cream. Dot it across one cheek, over the nose, and across the other cheek, then tap it out with your fingers so it fades at the edges. Keep the nose lighter than the cheeks.
Best for: light to medium skin with freckles, and a good match for casual outfits and low-key makeup. Skip if you have visible redness around the nose, because the look will draw attention to it. Pro tip: blot with a tissue before you start so cream does not slide off the nose.
7. Blush draping
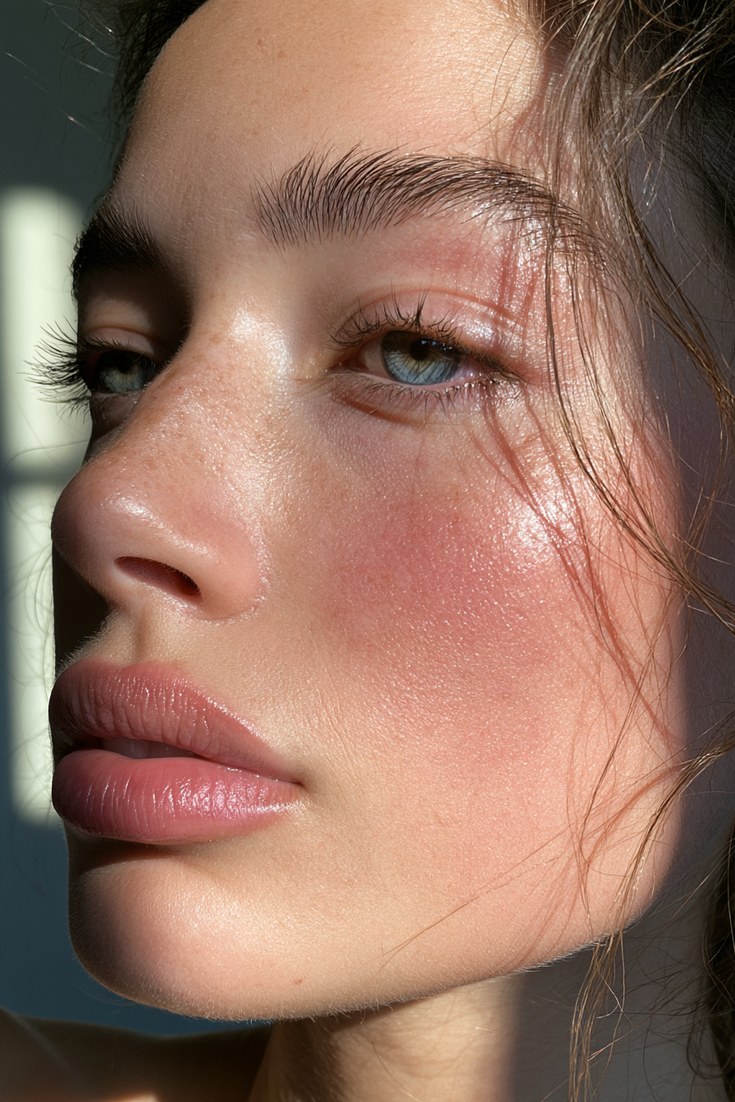
Draping borrows from 1970s makeup: instead of a round spot on the apple, you stretch the colour in a long diagonal, from the cheekbone up to the temple and sometimes over the outer eyelid. Done lightly, it makes the face look warm and structured at once.
Ask for a mid-tone rose, plum or terracotta in powder, which gives you more control for the long sweep. Use an angled brush, and load a small amount. Begin at the middle of the cheek, drag back toward the temple, then blend the top edge toward the eye.
Best for: oval, heart and long faces when kept horizontal, and for people who like a visible, editorial finish. Pro tip: match your eyeshadow to the blush family and the face looks styled together in one step.
8. Blush with bronzer
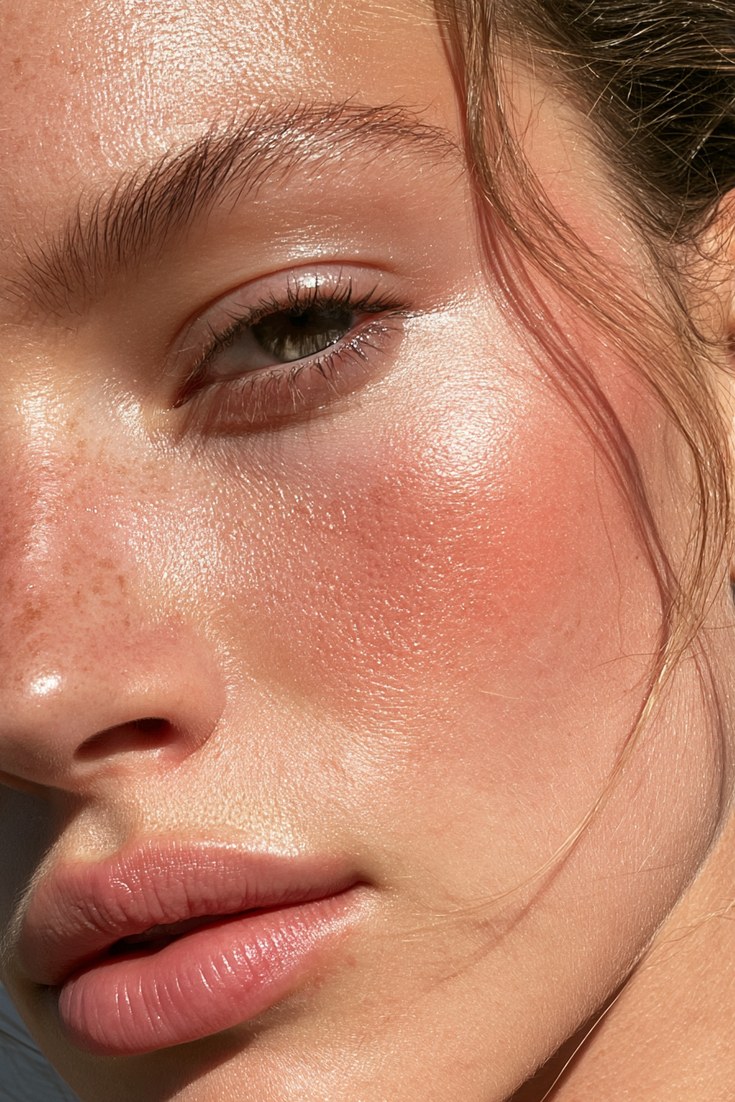
Winter skin loses its tan, and this look rebuilds it. Bronzer goes where the sun naturally hits (forehead edges, cheekbones, bridge of the nose), and blush sits on top of the apple for a pop.
Ask for a matte or satin bronzer that is one to two shades deeper than your skin, not orange, and a peach or soft pink blush. Sweep bronzer in a loose “3” shape from the temple, along the cheekbone, and down the jaw. Then place blush on the apple, a little higher than usual.
Best for: fair to medium skin that looks washed out in winter. Mistake to avoid: using bronzer below the cheekbone as hard contour, which makes the face look muddy. Pro tip: use cream bronzer with a cream blush so both melt into one flush.
9. Powder over cream

This layered method is how makeup artists get blush to last through a long evening. Cream first for the glow, powder on top for staying power and depth.
Press a cream or liquid blush on the apples and blend it out, wait for it to settle for a minute, then lightly dust a powder in the same or one shade deeper over the top. The Charlotte Tilbury Pillow Talk Matte Beauty Blush Wand (around $42) is a popular cream-style option to start with.
Best for: combination and oily skin, photos, parties and long days. Skip if you have very dry or flaky skin, as powder can emphasise texture. Pro tip: use a small fluffy brush for the powder step, and tap off the excess twice before touching your face.
10. Blush for mature skin
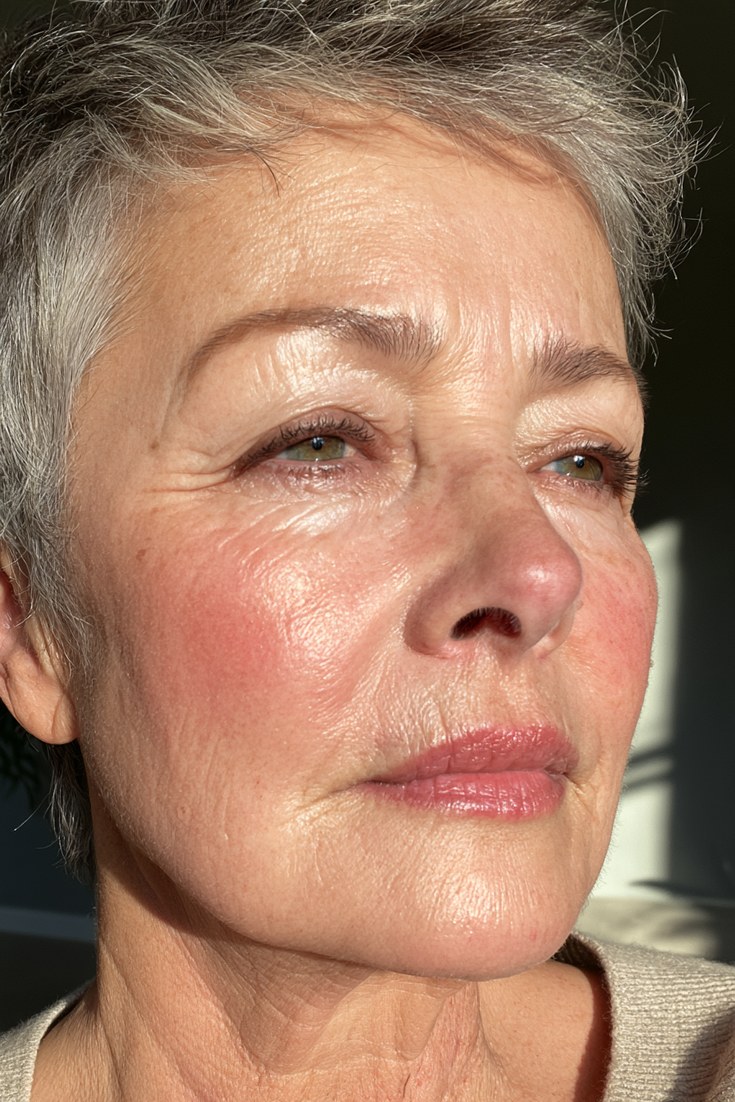
Mature skin does best with blush that looks like it is coming from inside the skin. Creams and liquids glide over fine lines, while heavy powders can settle into them.
Ask for a soft rose, warm pink or sheer peach in a cream, balm or liquid. Place it a touch higher than the apple, on the upper part of the cheek, and blend up and out toward the temple. That lifts the face. Colour placed too low can pull everything downward.
Best for: anyone with dry skin, fine lines or lost volume. Skip glittery or very shimmery blushes, which highlight texture. Pro tip: press, never rub. Pressing with the fingertips or a damp sponge keeps the colour sitting smoothly on skin. For more shades and techniques, our makeup ideas guide breaks down base, blush and lips in simple steps.
Where to place blush for your face shape
The looks above are flexible, but your face shape tells you where to start. Use these as starting points, not strict rules, and always check in natural light.
- Round face: place blush slightly higher on the cheeks, on the tops of the cheek apples, using the outer corners of your eyes as a guide, then sweep back toward the ears. This adds structure.
- Oval face: the most flexible shape. Blush the apples of the cheeks, then follow your cheekbone upward and outward if you want a more sculpted finish.
- Long face: sweep colour horizontally across the cheeks instead of diagonally up, and keep it low enough on the apple to add width. Avoid pulling colour up toward the temples.
- Square face: focus on the apples of the cheeks to soften the angles, blend in gentle circles, then sweep outward toward the ears. Stop the colour in line with the centre of your eyes, using your pupils as a marker.
- Heart face: start slightly lower on the cheek apples and move in a curved, U-shaped motion along the cheekbones toward the temples, swinging the brush back and forth to blend.
If you are not sure which shape you have, pull your hair back and look straight at a mirror. Compare the width of your forehead, cheekbones and jaw. Whichever is widest gives you a clue, and there is no wrong answer if your blush looks good to you.
Blush shade guide by undertone
To find your undertone, look at the veins on your inner wrist in daylight. Blue or purple suggests cool, green suggests warm, and a mix suggests neutral. Gold jewellery flattering you also points warm, and silver points cool.
| Undertone | Shades that flatter | Toasty picks |
|---|---|---|
| Cool | Rose, raspberry, cool pink, plum | Berry cheeks (look 4), rose sweep (look 1) |
| Warm | Peach, apricot, terracotta, coral | Peach-terracotta (look 3), blush with bronzer (look 8) |
| Neutral | Soft rose, dusty pink, rosy brown, warm mauve | Rosy brown (look 5), draping (look 7) |
Depth matters just as much. On fair skin, go sheer and pick lighter shades so the colour does not overwhelm. On medium and tan skin, true corals, warm roses and brick reds show up beautifully. On deep skin, rich berries, deep plum, burnt orange and chocolate rose give a lit-from-within flush, while pale pinks can look chalky.
If you are heading to a holiday party, a berry cheek goes well with the colours in our cranberry nail ideas, and a warm flush keeps a dark outfit from feeling flat, as in these New Year’s Eve outfits.
What to say at the beauty counter
Staff can match you much faster if you describe the result, not the product. Try these:
- “I want a sheer, warm flush that looks like my own skin, not a full coat of colour.”
- “Can you show me a cream blush in a peachy or terracotta shade for my undertone?”
- “I have oily skin. Which blush will last without sliding?”
- “I have dry or mature skin. Which formula will not settle into lines?”
- “Can I try it on my cheek, in daylight if possible?”
- “Which brush or sponge works best for this formula?”
Common blush mistakes and how to fix them
- Placing blush too low, on the hollows or near the jaw: lift it to the cheekbone and blend upward.
- Putting too much on at once: build in thin layers, especially with liquid and cream, which sets quickly.
- Starting too close to the nose: start the colour two fingers away from the nose and blend outward.
- Leaving a hard edge: use a clean brush or sponge to blur the border until the colour fades into skin.
- Choosing a shade that matches the lipstick but not the skin: pick the undertone first, then coordinate lips.
- Using powder blush on dry or textured skin: switch to a cream or liquid, or prep with moisturiser first.
How to apply blush: a quick timeline
- Before: moisturise and let skincare settle for a couple of minutes, so cream blush glides instead of grabbing.
- Order: cream and liquid blush go on after foundation and concealer, before powder. Powder blush goes on after setting powder.
- Build: one pass, step back, check in natural light, then add a second pass only if needed.
- Set (optional): for long wear, lightly press translucent powder over cream, or use the powder-over-cream method from look 9.
- Touch up: carry a cream or stick and tap a little over the original placement. Do not add a new layer in a different spot.
Blush placement FAQ
Where should I put blush if I have a round face?
Place it slightly higher on the cheeks, using the outer corners of your eyes as a guide, and blend toward the ears. This creates the impression of more structure than a circle on the apples.
Should I apply blush before or after foundation?
Cream and liquid blush go on after foundation and concealer so they do not get wiped away. Powder blush goes over a set base, after setting powder. If you wear no foundation, put cream blush straight on moisturised skin.
What blush colour suits my skin?
Match your undertone first: cool skin looks good in rose and berry, warm skin in peach and terracotta, and neutral skin in dusty rose and rosy brown. Then adjust the depth, going lighter and sheerer on fair skin and richer on deep skin.
How do I make blush last all day?
Use the layering method: cream first, powder on top. Start with a well-moisturised base, and avoid over-blending after it sets. Oily skin can benefit from a light dusting of translucent powder before the powder blush.
Is cream or powder blush better?
Neither is better overall. Cream and liquid give a glowy, skin-like finish and suit dry and mature skin, while powder lasts longer and suits oily skin. If you are unsure, start with a cream or liquid, since it is easier to blend and harder to overdo.
Save these blush looks for later
Pick one placement, one shade and one formula, and wear it for a week before changing anything. Small tweaks beat full makeovers. Save this article to your Pinterest board so you can pull up the face shape map when you are standing at the beauty counter or in front of your mirror.
Related Post