

Please note that we do not create all the designs featured in this article. Our primary focus is to curate and collect a diverse range of design collections and products to inspire and share with our audience. While we do not claim ownership or take full credit for the original designs and images, we occasionally make minor adjustments, particularly in home decor and fashion items, to present them more effectively. Additionally, we may produce and edit images to enhance their quality and composition before sharing them on our Pinterest page or website. For the design work we do on these creative designs, we also include our logo on the images shared on Pinterest and our website. This helps our audience recognize that these designs have been published on insiderlyfe.com!
Autumn nails do not have to be flat and dark. Some of the most beautiful November manicures rely on texture and light rather than loud color: a glossy tortoiseshell, a milky swirl, a thin line of gold that catches the lamp on a dinner table. These finishes make a simple palette of browns, plums and pinks look expensive.
This guide focuses on seven manicures where the finish or the metallic detail is the star. You will find how each effect is made, which products give the best results, and how to keep the look refined instead of busy. Gold is a recurring theme, but you can swap it for rose gold or silver depending on your jewelry.
Why Metallic Details Suit November
Shorter days mean more time under warm indoor light, and metallic accents are made for that setting. A fine line of gold reflects candlelight, string lights and screens in a way that a flat color cannot. Browns, plums and creams provide the quiet background that lets those accents glow. The result looks festive without moving into full holiday glitter before its time.
1. Glossy Brown With Gold Outlines
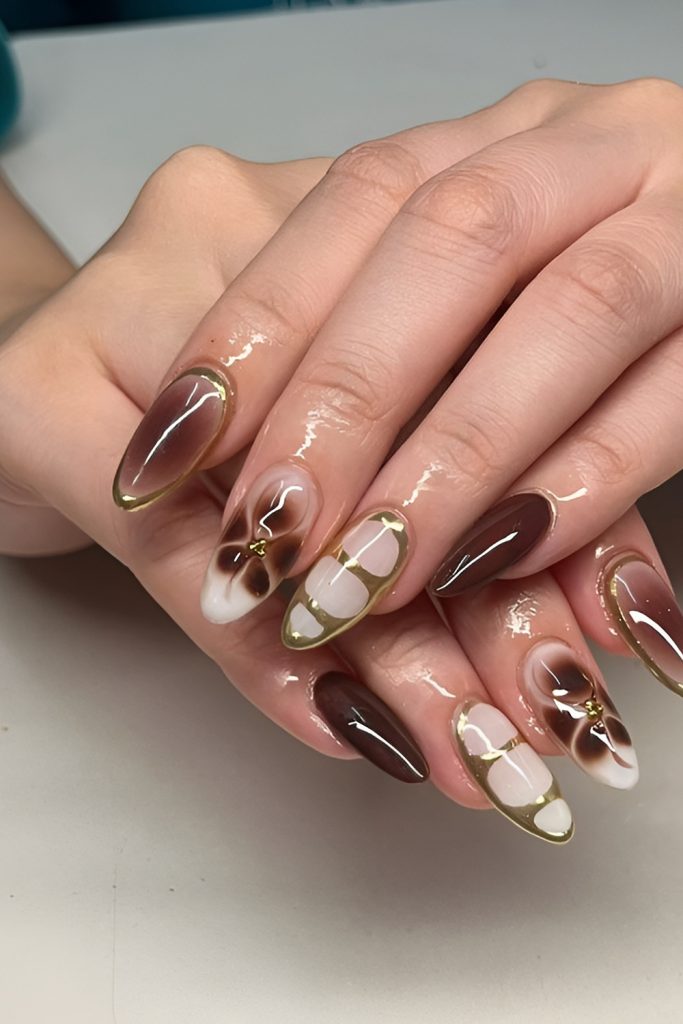
A translucent brown base looks like stained glass on the nail. The gold outline on the accent nails draws a small flower shape, and a couple of nails are left as plain brown for balance. This is the design to choose if you want something decorated but gentle.
To recreate it, paint two thin coats of a sheer brown jelly polish, cure or dry it, and use a very fine brush with metallic polish to trace the shapes. Seal everything with a thick, glossy top coat so the outline sits under the shine and does not peel.
2. Plum Marble With Foil
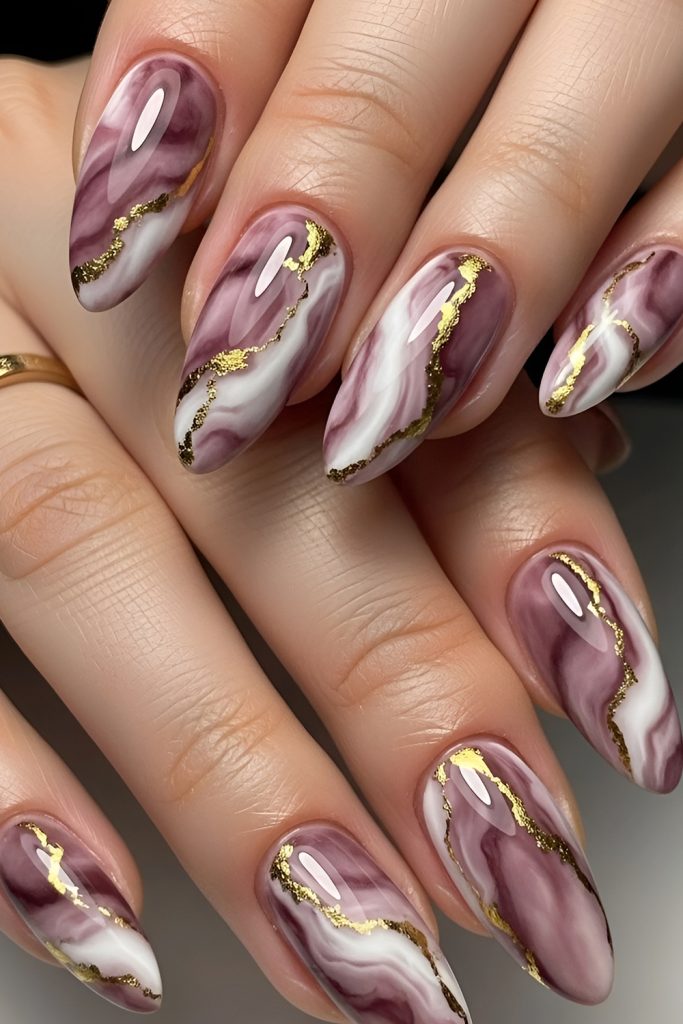
Marble works best when the colors are close together. Plum, mauve and cream blend into each other, and the gold foil outlines the swirls so the pattern looks deliberate. Every nail ends up unique, which is part of the charm.
A tip for beginners: use a dotting tool or a toothpick to drag the colors while the base is still tacky. Do not overwork it. A few light swirls look better than a muddy blend. Add the foil last and press it gently with a silicone tool or a clean fingertip.
3. Tortoiseshell With Gold Flecks
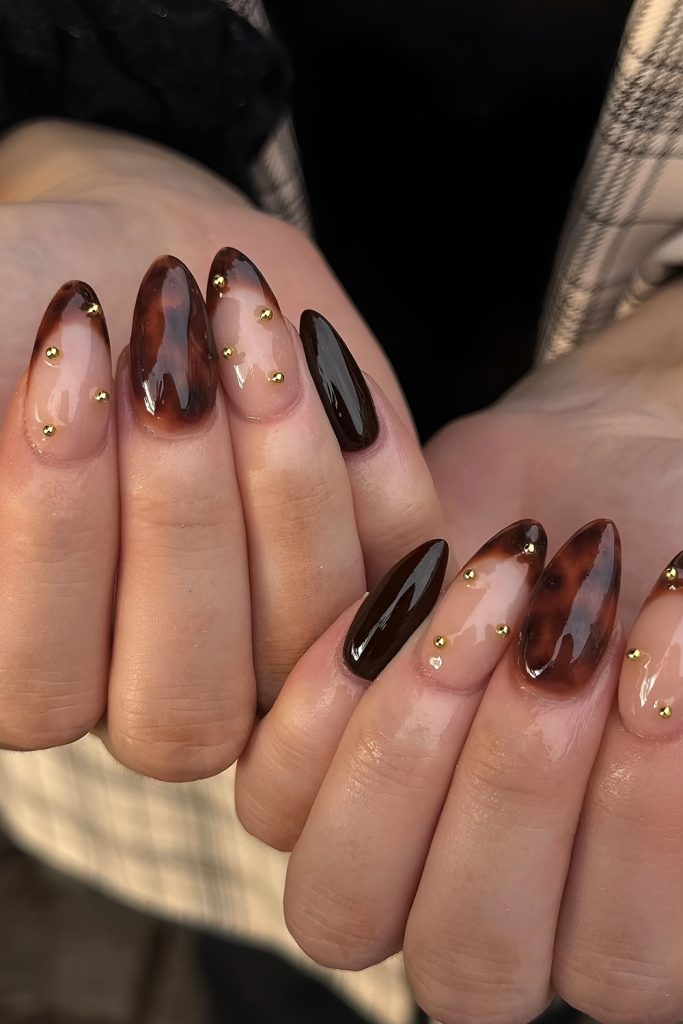
Tortoiseshell patterns are made by dabbing amber and dark brown polish onto a sheer base with a sponge or small brush. The effect softens the dark color and adds depth. The gold flecks concentrate near the cuticle, giving the nails a subtle glow without making them sparkly.
Keep the flecks sparse. Four or five per nail is plenty. Too many will cover the pattern and make the design look crowded.
4. Sheer Pink With a Light Edge
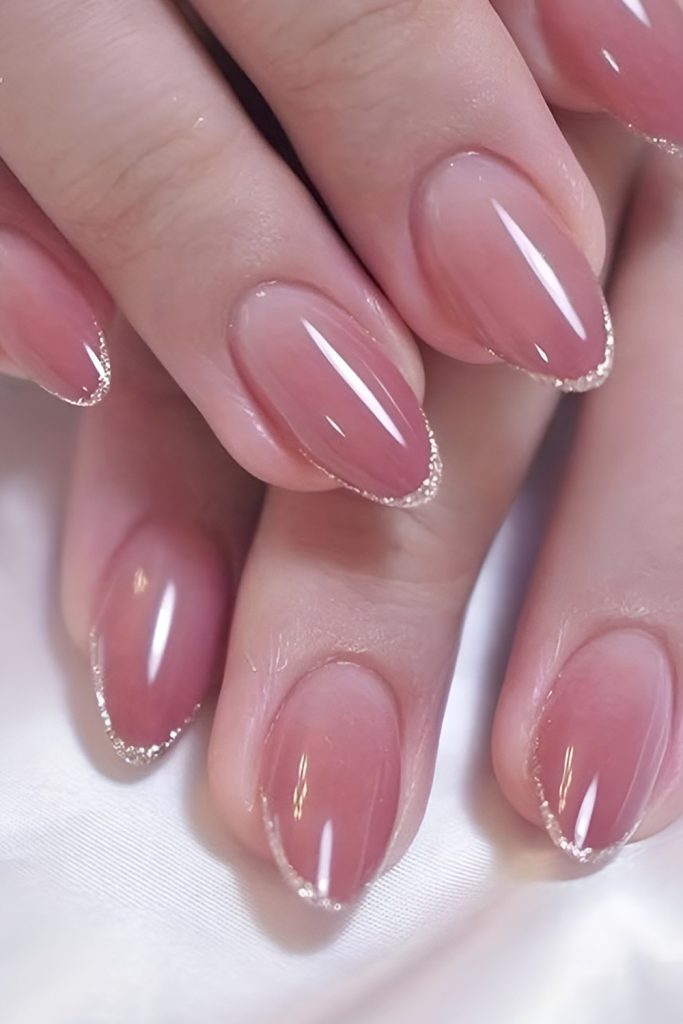
Not every metallic detail needs to be gold. Here, a very light shimmer outlines a sheer pink gradient. It frames the nail and keeps the shape crisp. The look is polished and quiet, so it is ideal for events where you want your hands to look elegant but not themed.
5. Burnt Orange With a Leaf Accent
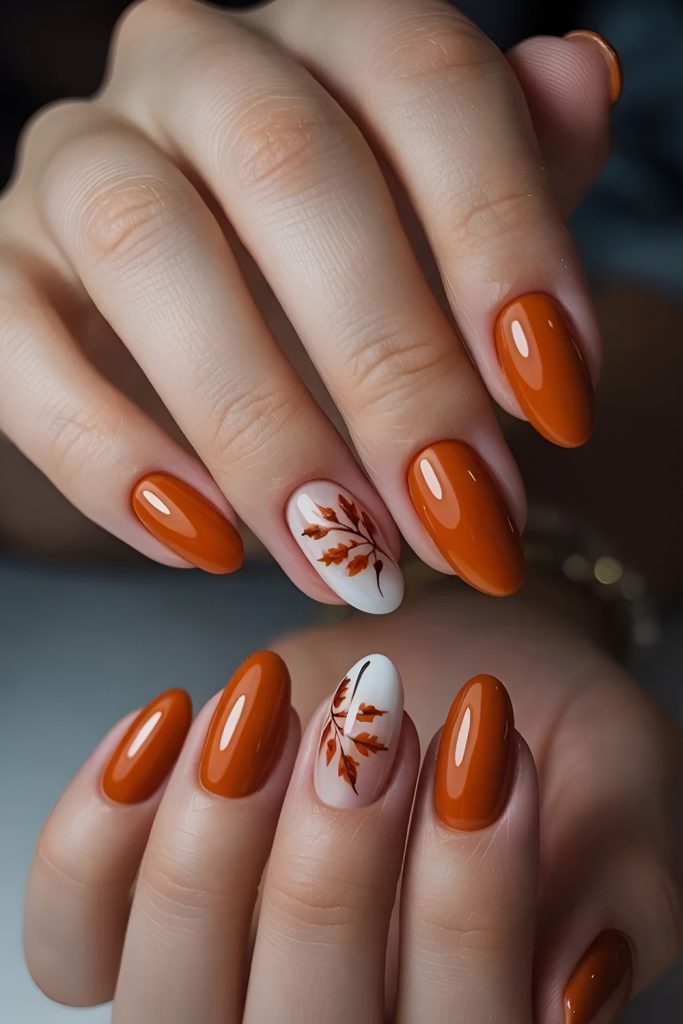
You can add a metallic leaf vein or a tiny gold dot to this design for extra shine, but even without it the contrast between orange and cream carries the manicure. The leaf is painted freehand with a thin brush and two shades of orange, and it is always smaller than you think it needs to be.
6. Cream and Chocolate With Hairline Detail
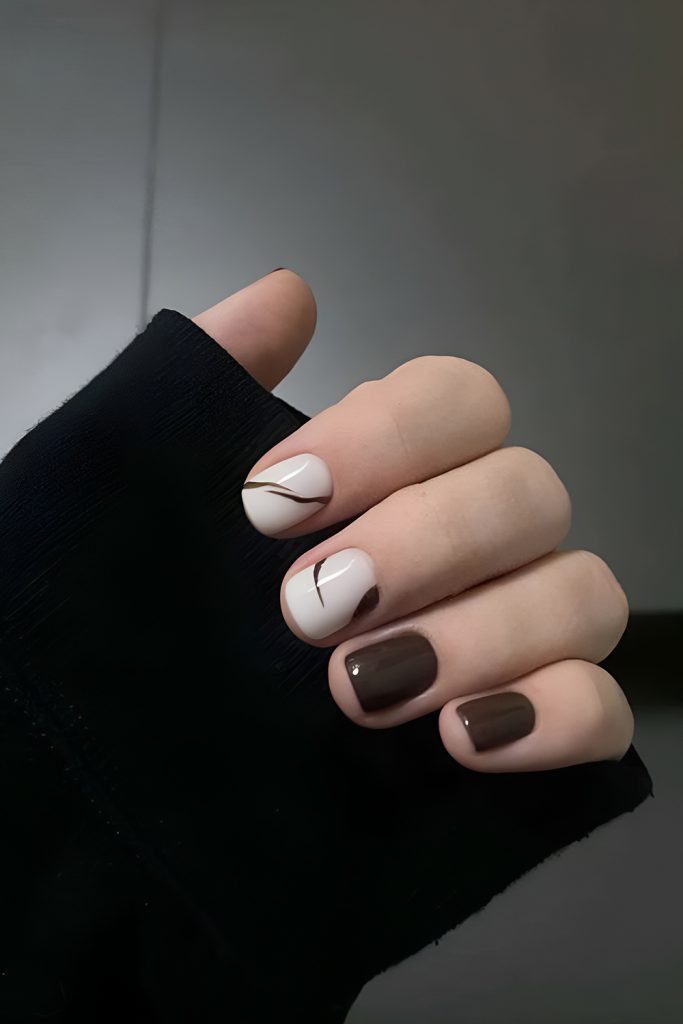
For short nails, minimal detail works better than big art. Two cream accents with a fine line and the rest in chocolate brown create a clean, graphic effect. Replace the black line with gold for a warmer version.
7. Olive With a Milky Tip
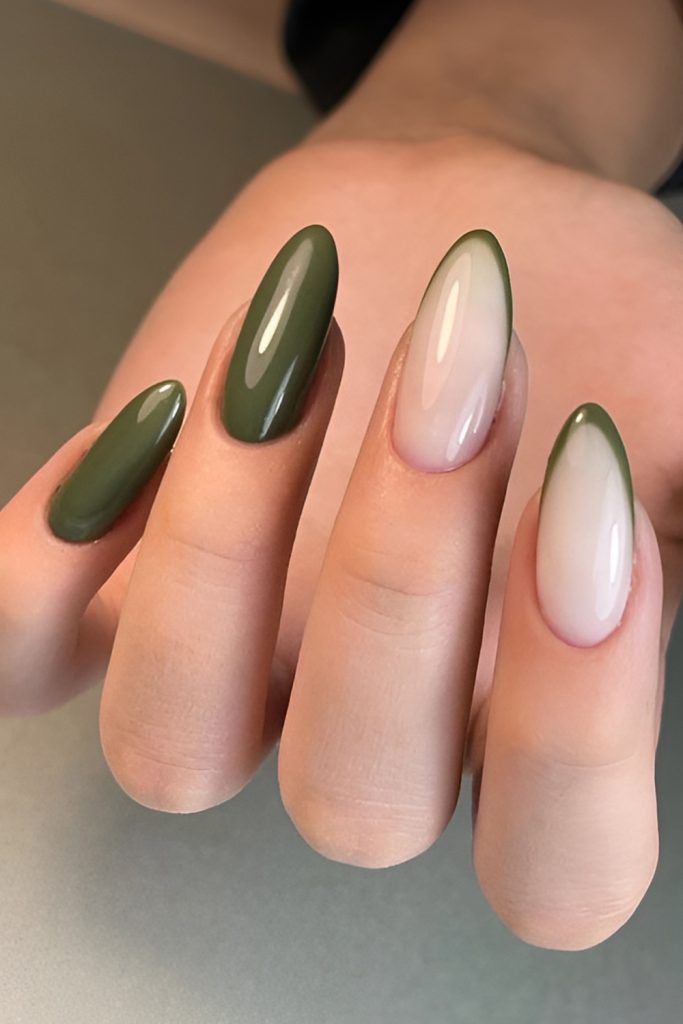
The final design uses finish rather than metal. Glossy olive against a milky sheer nail gives the manicure contrast and movement. Add a single dot of gold near the cuticle on the milky nail if you want a hint of metal.
Choosing the Right Base Color for Your Accent
The base color determines how metallic detail will look. Warm browns and oranges make gold look rich and antique. Plum, mauve and cool pinks make rose gold and silver look crisp. A cream base makes any metal pop, because the contrast is high. If you are unsure, start with a neutral base like sheer brown or milky white and add the metal accent afterward. You can always change the accent later without repainting the whole nail.
Also consider the finish of the base. A glossy base makes foil look smooth, while a matte base makes it look dramatic and almost leathery. For beginners, glossy is easier, since a thick top coat hides small imperfections around the metal edges.
A Step by Step Method for Any Gold Accent
- Prep the nails with a gentle file, cuticle care and an alcohol wipe.
- Apply a base coat and let it dry completely.
- Paint two thin coats of your chosen base color.
- Add the accent with a fine brush or a piece of foil, keeping it small and precise.
- Wait for the accent to dry, then clean up the edges with a brush dipped in remover.
- Finish with a thick, glossy top coat and cap the free edge.
Patience is the most useful tool in this routine. Rushing makes polish streak and metal lines wobble. Set a timer between steps if you tend to hurry, and work with good light so you can see tiny gaps along the edges.
Seasonal Occasions That Suit These Manicures
Textured and metallic manicures shine at small gatherings: a family dinner, a book club evening, a friend’s birthday, or the first holiday party of the season. They also photograph well, because light reflects off the finish, so they are a good choice if you will be in a group photo. For everyday wear, keep the metallic detail small and choose a color you will not tire of after a few days.
Tools and Products That Make Detail Work Easier
- A fine striping brush for lines and outlines. A thin, long bristle holds more polish and gives smoother strokes.
- A dotting tool for flecks, dots and marble swirls.
- Metallic polish or nail foil in gold, rose gold or silver.
- A thick top coat that levels over raised designs and seals the metallic layer.
- A cleanup brush and remover to sharpen edges before the top coat.
How to Keep Metallic Nails From Looking Busy
Choose one place for the metallic detail and let everything else stay simple. If you use foil on one nail, keep the others solid. If you outline the tips, avoid adding other patterns. Limiting yourself to one effect per hand makes the manicure look planned, and it also makes it easier to repair if one nail chips.
Think of metallic polish the way you would think of a statement necklace. One piece is stylish. Five piled together can distract from each other. If you are wearing jewelry, match the metal tone so the whole look feels coordinated.
Caring for Textured and Layered Manicures
Designs with several layers of polish are a little more delicate than plain color. Avoid hot water immediately after painting, because it can soften the polish. Wear gloves when washing dishes and apply a fresh top coat every two or three days. If a foil edge starts to lift, press it down with a drop of top coat and a clean brush instead of peeling it.
Frequently Asked Questions
Can I do foil nails at home?
Yes. Use a foil glue or a slightly tacky base coat, press the foil on, and seal it with a top coat. Practice on one nail first.
Does gold look good on all skin tones?
Gold is popular on warm and neutral skin, but it can be flattering on any tone if the surrounding color is balanced. Rose gold and silver are good alternatives.
How do I stop metallic polish from looking streaky?
Apply it in thin layers and let each coat dry. Streaks are usually caused by overworking the brush or applying it too thickly.
What is the easiest design on this list?
The olive and milky tip manicure and the cream and chocolate hairline design are the simplest. Both rely on solid color with a minimal accent.
Final Thoughts
A small touch of gold or a glossy texture is often all a November manicure needs. Choose one design from the list, focus on neat application and a strong top coat, and you will have nails that look finished from every angle.
Related Post