
Please note that we do not create all the designs featured in this article. Our primary focus is to curate and collect a diverse range of design collections and products to inspire and share with our audience. While we do not claim ownership or take full credit for the original designs and images, we occasionally make minor adjustments, particularly in home decor and fashion items, to present them more effectively. Additionally, we may produce and edit images to enhance their quality and composition before sharing them on our Pinterest page or website. For the design work we do on these creative designs, we also include our logo on the images shared on Pinterest and our website. This helps our audience recognize that these designs have been published on insiderlyfe.com!
If you’ve ever looked at a holiday hairstyle on Pinterest and thought, “I could never do that,” this guide is for you.
Most “simple” hairstyle lists assume you already know how to French braid, use a curling iron and pin an updo without a mirror. Real beginners deserve better.
So every one of these 15 Thanksgiving hairstyles is ranked from easiest to most adventurous, and almost all of them need nothing more than a brush, a few elastics, some bobby pins and one accessory.
Thanksgiving 2026 is Thursday, November 26.
That gives you time to practice the one you like once or twice before the big day, which is honestly the biggest secret to looking polished.
For each style, you’ll see what you need, a beginner difficulty level and one tip that makes it easier the first time.
Keep an eye on number 8, the updo for people who are sure they can’t do updos. And number 12 is the ponytail trick that looks like a braid but takes about a minute.
After the list, you’ll find a difficulty chart, two step-by-step walkthroughs and the beginner mistakes that are easiest to avoid.
The quick answer: what is the easiest Thanksgiving hairstyle for beginners?
A low ponytail with a ribbon, a messy bun with a scrunchie or a padded headband on loose hair are the easiest Thanksgiving hairstyles for beginners.
Each needs one or two tools and takes about five minutes.
Once you’re comfortable, a claw clip twist, a topsy tail ponytail or a simple side braid is the natural next step.
1. Low ponytail with a burgundy ribbon
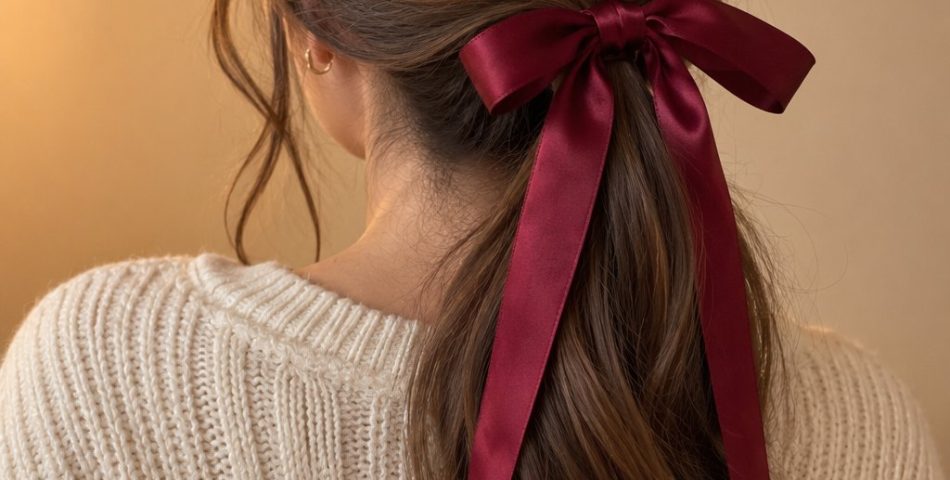
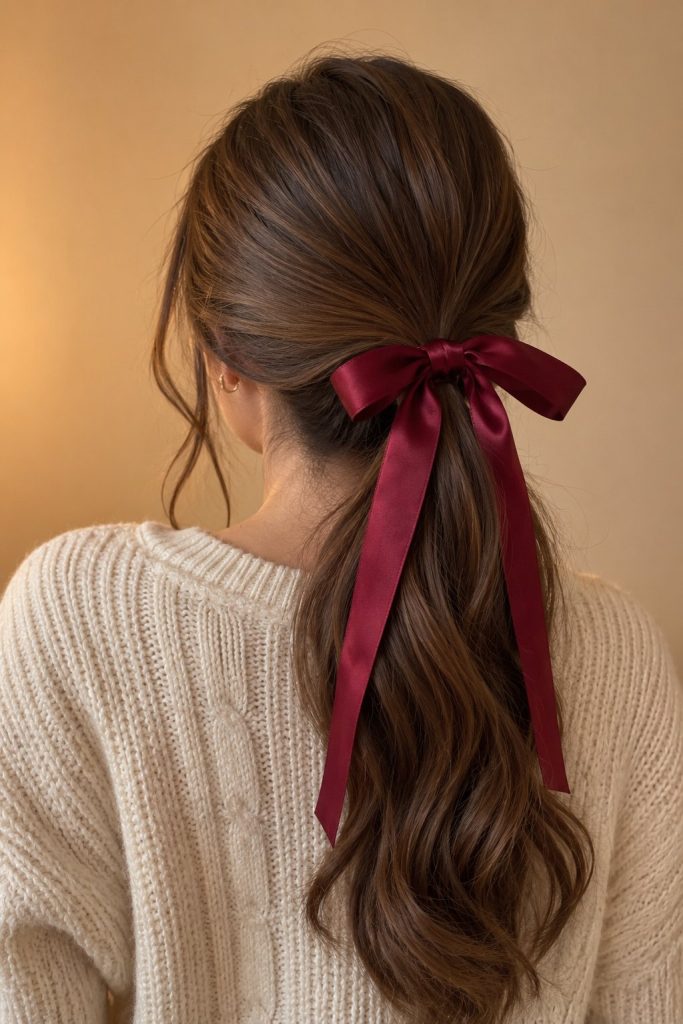
If you can make a ponytail, you can make this. Brunette hair is gathered into a low, soft ponytail, and a burgundy satin ribbon is tied over the elastic in a bow with long tails.
A cream cable knit sweater keeps it cozy and seasonal. It looks thoughtful and festive, but it’s really just a ponytail and a ribbon.
For more ideas, see our hair bow hairstyles that look grown-up.
You’ll need: A brush, a clear elastic and about 30 inches of satin ribbon.
Beginner level: 1 of 3.
Beginner tip: Tie the ribbon over the elastic, never instead of it. The elastic does the holding.
2. Messy bun for curly hair
Curly hair has a built-in advantage: messy buns look better with texture. Dark brown curls are piled loosely at the crown, and soft tendrils fall around the face and neck.
A gold huggie earring and a white camisole keep the look fresh. There’s no wrong way to do it, which is why it’s perfect for beginners.
It’s comfortable for a whole day of cooking and visiting.
You’ll need: One scrunchie or soft elastic and two or three bobby pins.
Beginner level: 1 of 3.
Beginner tip: Flip your head upside down to gather the hair. It puts the bun in the right spot automatically.

3. Messy bun with a plaid scrunchie
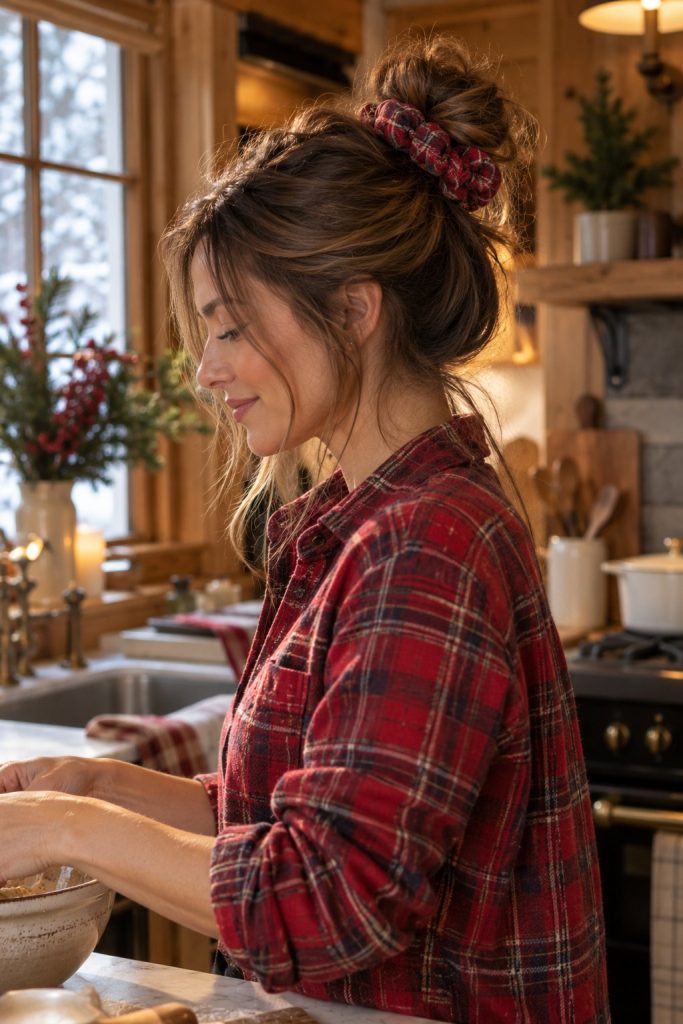
This is the straight-hair version of the same easy bun. Medium-length brown hair is twisted into a loose bun at the back of the head and wrapped with a red plaid scrunchie.
Paired with a red flannel shirt in a cozy kitchen, it feels warm and relaxed. The scrunchie does double duty as hold and decoration.
It’s ideal if you’re helping with the cooking.
You’ll need: One plaid or velvet scrunchie.
Beginner level: 1 of 3.
Beginner tip: Twist the ponytail before wrapping it. Twisted hair holds a bun shape better than loose hair.
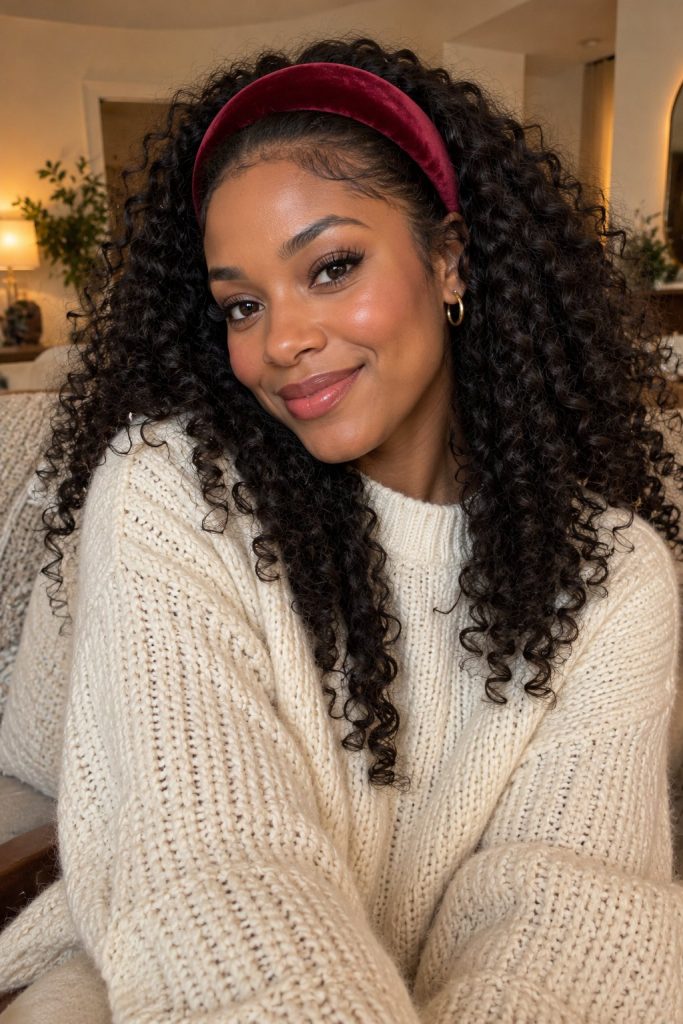
4. Natural curls with a velvet headband
A padded headband is the easiest way to make loose hair look styled. Long, natural curls fall freely, with a burgundy velvet headband pushing them back from the face.
A cream chunky knit and a warm smile make it perfect for a family dinner. No braiding, no pinning and no heat.
Velvet grips curls much better than plastic, so it stays in place all day.
You’ll need: A padded velvet headband and a little curl cream.
Beginner level: 1 of 3.
Beginner tip: Slide the headband on from the back of your neck forward, so it doesn’t flatten the curls on top.
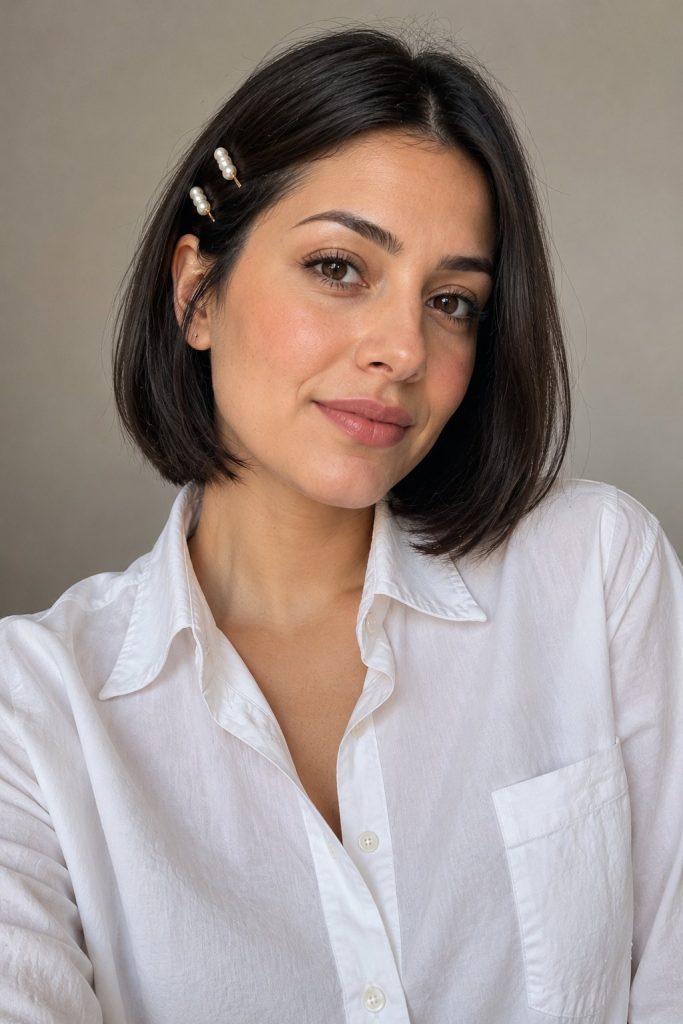
5. Short bob with pearl clips
Short hair gets the easiest upgrade of all. A sleek black bob is tucked behind the ears, with two small pearl clips placed together on one side.
A crisp white shirt keeps the look simple and polished. It takes about a minute and works on any short cut.
Our winter bob haircuts has more ways to style a bob.
You’ll need: Two small pearl clips and a comb.
Beginner level: 1 of 3.
Beginner tip: Place the clips just above the ear, angled slightly back. They look intentional and hold the hair away from your face.
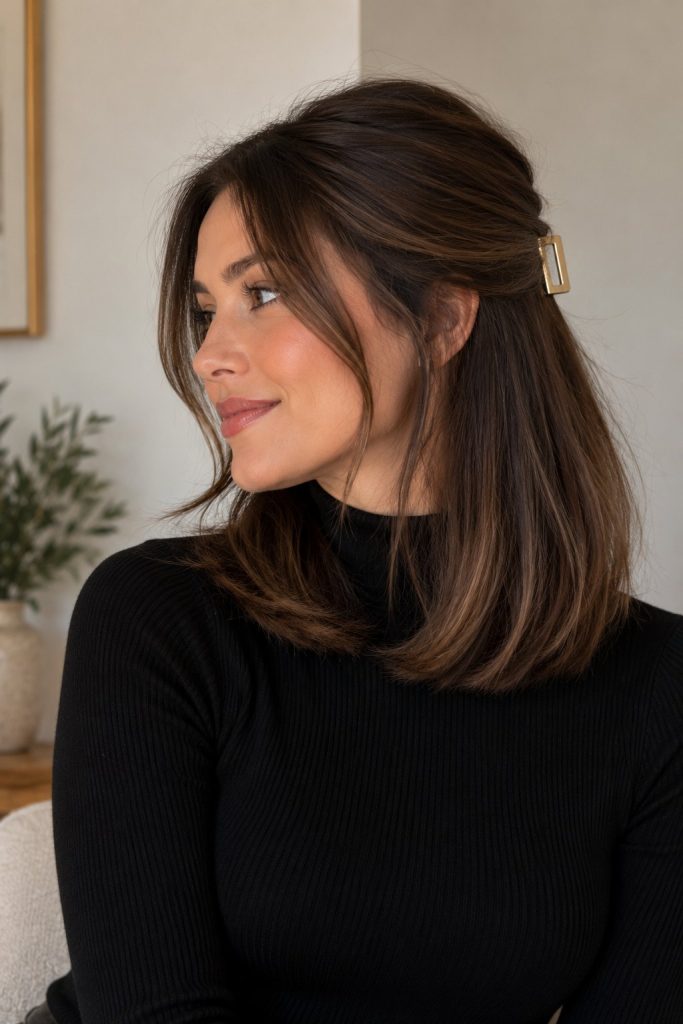
6. Half-up with a gold barrette
This is the simplest half-up style there is. Shoulder-length dark brown hair is smoothed back at the crown and held with a plain gold barrette, while the rest falls straight.
A black ribbed turtleneck keeps it chic and minimal. It’s a great choice if you’d like your hair down but out of your face.
It works on almost any hair length.
You’ll need: A brush and one barrette.
Beginner level: 1 of 3.
Beginner tip: Use your thumbs to section the hair from the top of each ear up to the crown. That’s your “half.”
7. Sleek low bubble ponytail with red ribbons
A bubble ponytail looks detailed, but it’s really just a ponytail with extra elastics.
Dark hair is brushed back into a low ponytail, then small elastics are added down its length to create soft bubbles.
Red satin ribbons are tied at the top and between sections, matching a red satin camisole. Burgundy or rust ribbons would feel even more autumnal.
It’s fun, festive and very hard to mess up.
You’ll need: A brush, four or five clear elastics and two lengths of ribbon.
Beginner level: 1 of 3.
Beginner tip: After each elastic, gently tug the section wider with your fingertips. That’s what makes the bubbles look full.

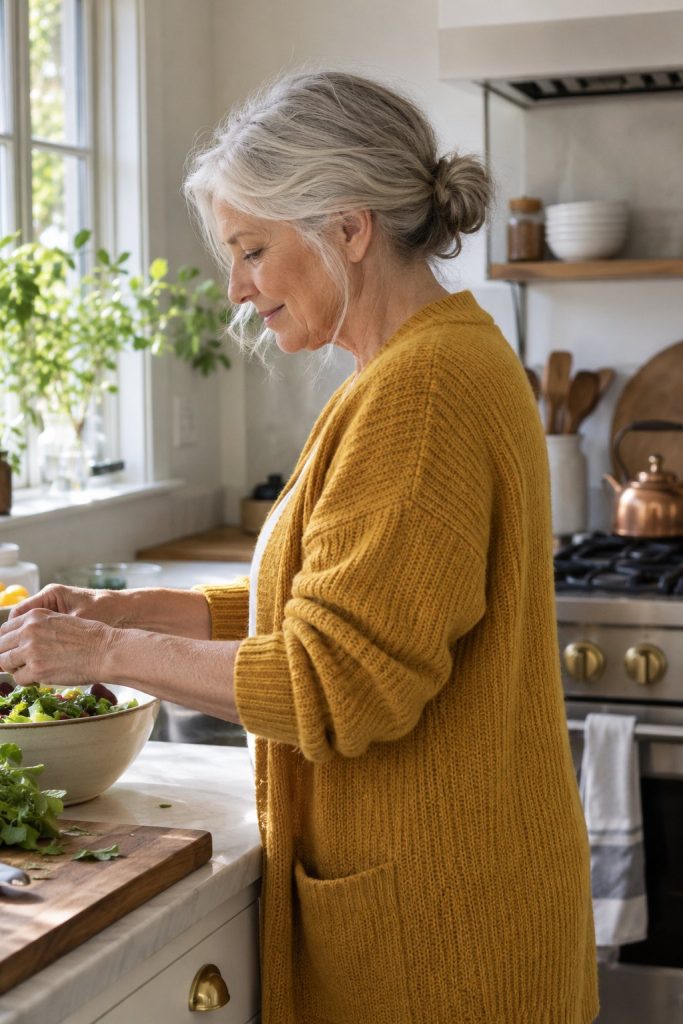
8. Easy low knot bun
Here it is, the updo for people who think they can’t do updos. Silver gray hair is twisted into a soft, low knot at the nape, with a few loose pieces around the face.
A mustard yellow cardigan and a bright kitchen make it warm and welcoming. The knot looks graceful, but it’s really just a ponytail tied around itself.
Our updo hairstyles for holiday dinners has more ideas once you’re hooked.
You’ll need: A brush, one elastic and four bobby pins.
Beginner level: 1 of 3.
Beginner tip: Make a low ponytail, twist the tail, wrap it around the elastic and tuck the end underneath with pins.
9. Sleek high top knot
A top knot is quick, chic and surprisingly forgiving. Dark brown hair is brushed back smoothly into a neat knot right at the crown.
Large gold hoops, a long gold necklace and a black cape blazer make it look runway-ready, but it works just as well with a cozy sweater.
It’s also the perfect style for anyone cooking, since every strand is out of the way.
You’ll need: A brush, one elastic, a few bobby pins and a little smoothing cream.
Beginner level: 1 of 3.
Beginner tip: Tie the ponytail exactly where you want the knot before twisting. The bun always sits where the elastic sits.
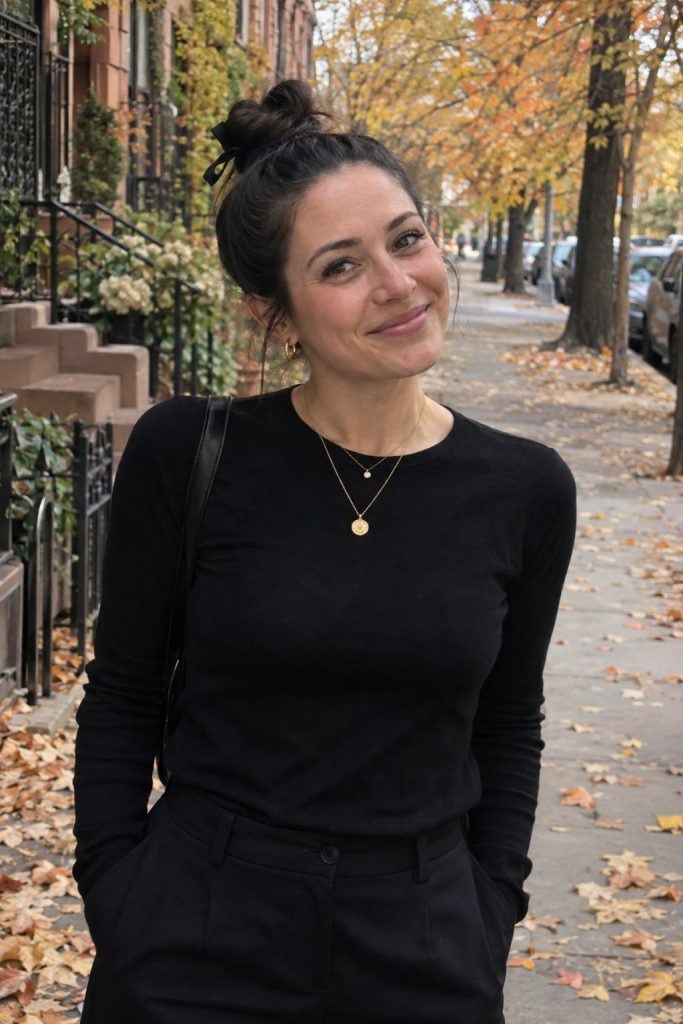
10. Half-up ponytail on long waves
Ready for a slightly bigger half-up? The top section of long dark brown hair is pulled back with volume at the crown, while the rest falls in glossy waves.
A white strappy top keeps it simple. Half-up styles are great for beginners because the back is mostly hidden, so small mistakes don’t show.
Explore more variations in our ponytail hairstyles.
You’ll need: A brush and one clear elastic.
Beginner level: 1 of 3.
Beginner tip: Lightly tease the crown section before tying it for easy volume.

Halfway there. Number 12 is just ahead, and it’s the ponytail trick every beginner should know.
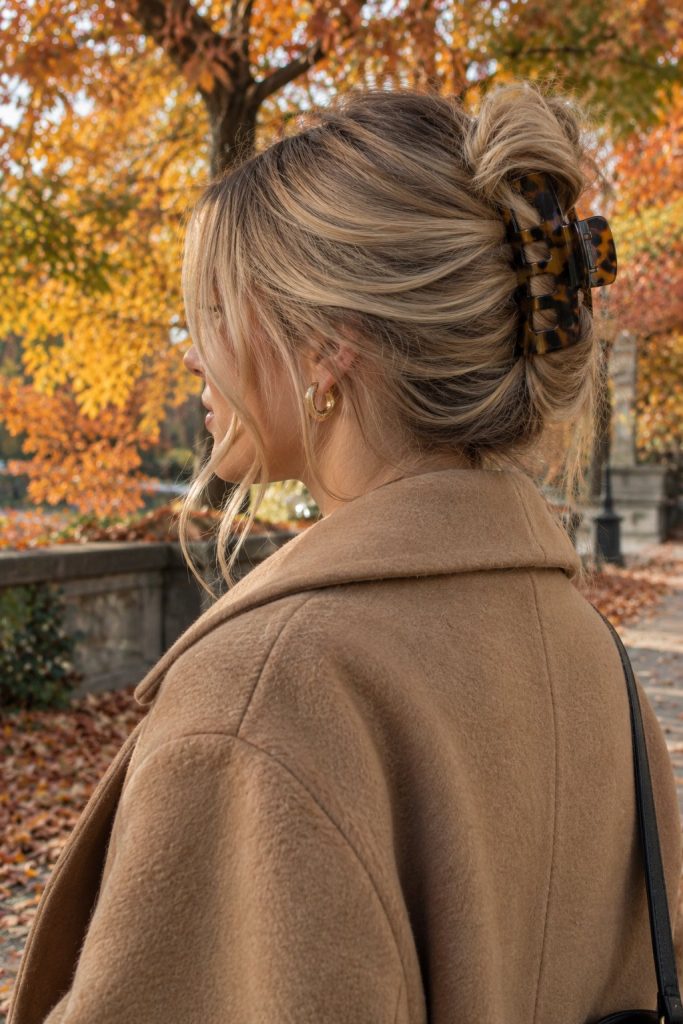
11. Claw clip twist
A claw clip twist looks like a polished updo in about 30 seconds.
Blonde hair is twisted up the back of the head and held with a large tortoiseshell claw clip, with a few loose pieces left around the face.
A camel wool coat and autumn trees make it perfect for a walk before dinner. It’s a beginner favorite for good reason.
The bigger the clip, the more hair it can hold.
You’ll need: One large claw clip.
Beginner level: 2 of 3.
Beginner tip: Gather the hair into a ponytail shape with your hand, twist upward and clip with the teeth facing down.
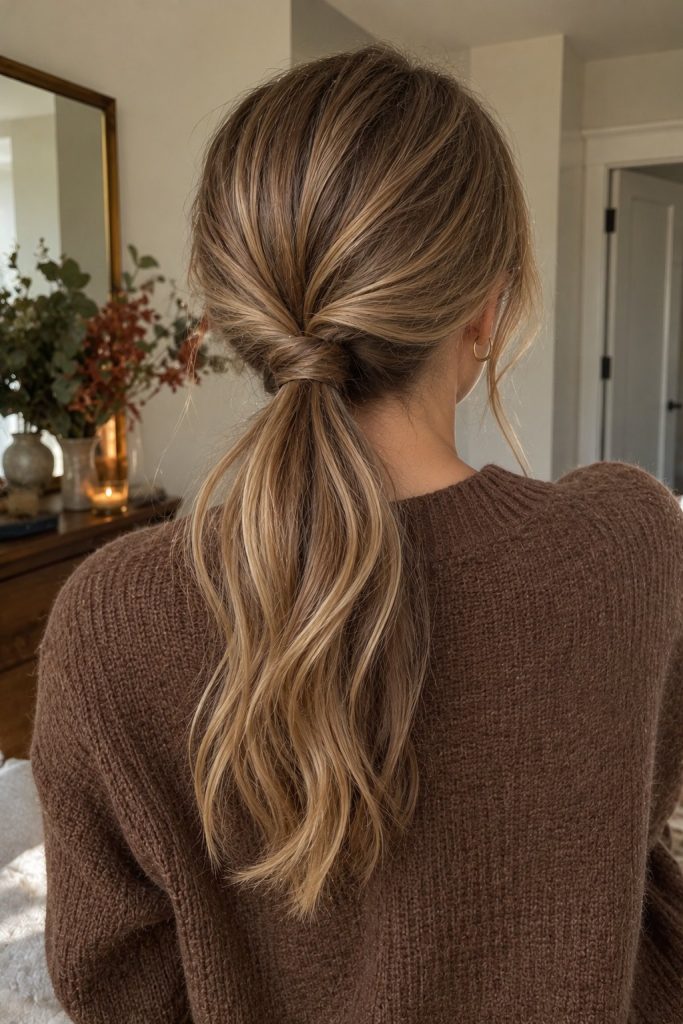
12. Topsy tail ponytail
This is the one we teased. Highlighted brown hair is tied in a low ponytail, then the ponytail is flipped through a gap above the elastic to create a twisted, braid-like look.
A brown knit sweater keeps it cozy. It looks like it took real skill, but it’s one of the quickest tricks in this guide.
Once you learn it, you can use it on any ponytail.
You’ll need: A brush and one clear elastic.
Beginner level: 2 of 3.
Beginner tip: Loosen the elastic slightly before making the gap above it. It makes flipping the ponytail through much easier.
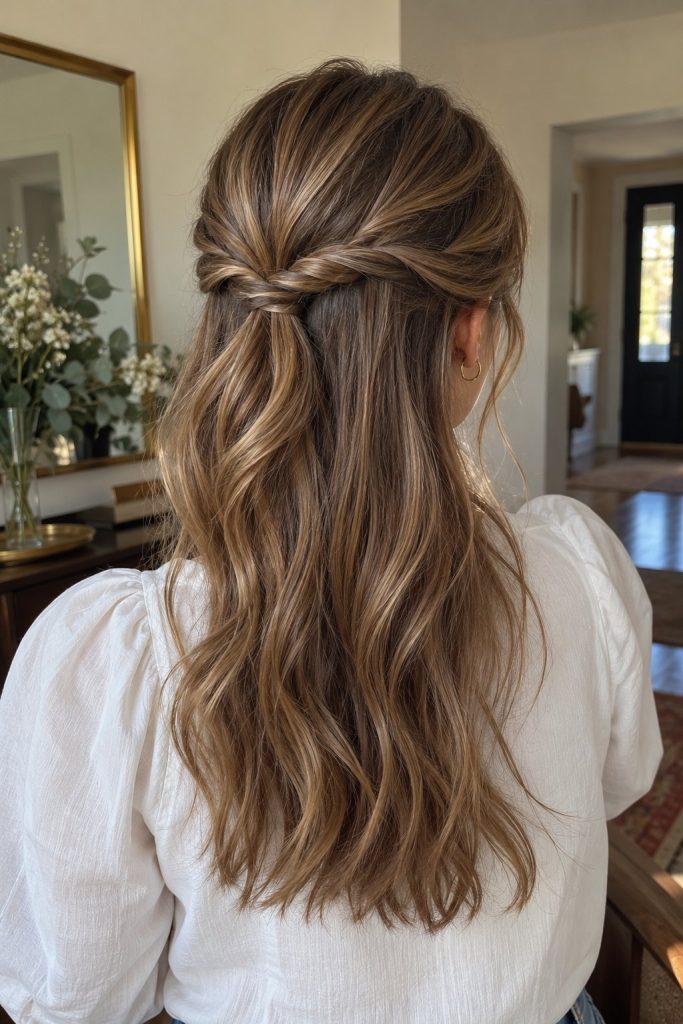
13. Half-up rope twists
Two simple rope twists, one from each side, meet at the back of the head and are pinned together here, while the rest of the highlighted brown hair falls in soft waves.
A white blouse keeps it light and pretty. From a distance it looks like a braid, but twisting is much easier for beginners.
It’s lovely for a family dinner.
You’ll need: A clear elastic and two bobby pins.
Beginner level: 2 of 3.
Beginner tip: Twist each section away from your face, then cross the two twists and secure them with a clear elastic.
14. Simple side braid
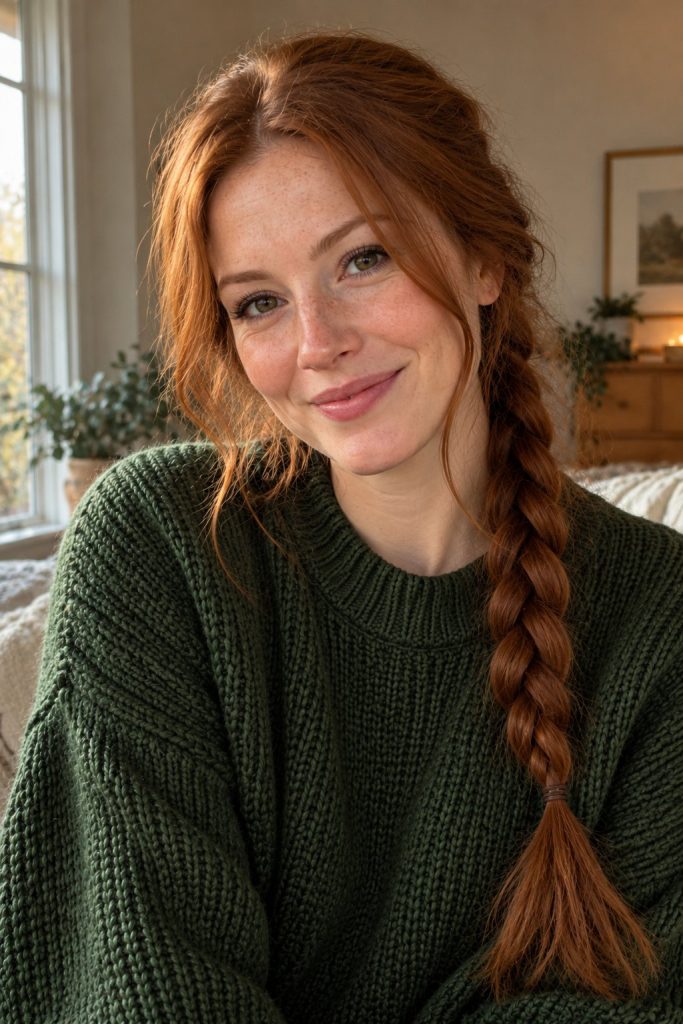
A classic three-strand braid over one shoulder is a skill worth learning. Natural red hair is braided loosely to the side, with a few soft pieces left around the face.
A forest green knit sweater makes the red tones glow. It’s cozy, pretty and holds all day.
Find more ideas in our Thanksgiving braids roundup.
You’ll need: A brush and a clear elastic.
Beginner level: 2 of 3.
Beginner tip: Sweep all your hair over one shoulder before you start. It’s much easier to braid where you can see it.
15. Loose fishtail braid with curtain pieces
We saved the most adventurous for last. Highlighted brown hair is pulled into a loose fishtail over one shoulder, with long curtain pieces framing the face.
It’s soft and romantic, especially with a satin top. Many beginners find a fishtail easier than a regular braid once they try it, because it only uses two sections.
Pull the edges gently once it’s done to make it look fuller.
You’ll need: A brush, a clear elastic and a little texture spray.
Beginner level: 3 of 3.
Beginner tip: Split the hair in two, take a thin piece from the outside of one half and cross it to the other. Repeat. That’s the whole technique.

Beginner difficulty chart
| Level | Styles | What you need to know |
|---|---|---|
| 1 of 3 | Ribbon ponytail, curly bun, scrunchie bun, velvet headband, bob with clips, barrette half-up, bubble ponytail, low knot, top knot, half-up ponytail | How to brush and tie a ponytail |
| 2 of 3 | Claw clip twist, topsy tail, rope twists, side braid | Simple twisting and braiding |
| 3 of 3 | Fishtail braid | Working with small sections |
How to do a topsy tail ponytail
- Tie a low ponytail and loosen the elastic slightly.
- Split the hair above the elastic with two fingers to make a small gap.
- Flip the ponytail up and through the gap from top to bottom.
- Pull the ponytail tight and gently loosen the twisted sections for a softer look.
How to do a simple three-strand braid
- Brush your hair over one shoulder.
- Split it into three equal sections.
- Cross the right section over the middle, then the left section over the new middle.
- Repeat to the ends and tie with a clear elastic.
- Gently pull the edges wider for a fuller braid.
The beginner’s Thanksgiving hair kit
You don’t need a drawer full of tools. These few items cover every style in this guide.
- A paddle brush and a wide-tooth comb for smoothing and detangling.
- Clear elastics and a few soft scrunchies for ponytails, buns and braid ends.
- Bobby pins in your hair color, plus a handful of U-shaped pins for buns.
- One large claw clip for quick twists and emergencies.
- One festive accessory, like a satin ribbon, a velvet headband or pearl clips.
- Dry shampoo or texture spray to give clean hair some grip.
A simple practice plan for the week before
- The weekend before: Try two styles from the first half of the list. Pick your favorite.
- Midweek: Practice your favorite once more and time yourself, so you know how long it really takes.
- Wednesday night: Lay out your elastics, pins and accessory next to the mirror.
- Thanksgiving morning: Do your style before you start cooking or getting dressed, then add the accessory last.
Beginner mistakes that are easy to avoid
- Starting on freshly washed hair. Clean hair is slippery. Second-day hair or a little dry shampoo makes everything easier.
- Using too many pins. Two pins crossed in an X hold better than five scattered ones.
- Skipping practice. Try your style once before Thanksgiving. The second attempt always looks better.
- Expecting perfection. Soft, imperfect texture is part of the charm of most holiday styles.
Want to plan by time instead? Our elegant Thanksgiving hairstyles sorted by time is the perfect companion, and our night-before Thanksgiving hairstyles show how to prep on Wednesday.
Simple Thanksgiving hairstyles: your questions answered
What is the easiest Thanksgiving hairstyle?
A low ponytail with a ribbon or a messy bun with a scrunchie. Both need only one or two items and take about five minutes.
Can I do a nice Thanksgiving hairstyle without heat tools?
Yes. Ponytails, buns, half-up styles, claw clip twists and braids all work without heat. For waves, sleep in loose braids the night before.
How do I make a simple hairstyle look more festive?
Add one accessory, like a ribbon, pearl clips, a velvet headband or a plaid scrunchie. A rich lip color and a pair of statement earrings also help.
What hairstyle is best for beginners with short hair?
Tuck a bob behind your ears and add two small pearl clips on one side, or use a padded headband. Both take about a minute.
How can I practice braiding before Thanksgiving?
Practice on second-day hair while watching TV, or braid a friend’s or family member’s hair first. Seeing the braid in front of you makes the steps click faster.
Start simple, then level up
You don’t need years of practice to look polished on Thanksgiving. You just need one style you’re comfortable with.
Pick something from the first half of this list, try it once this week and enjoy how easy it feels on the day.
Next year, you’ll be ready for the fishtail.
Related Post