

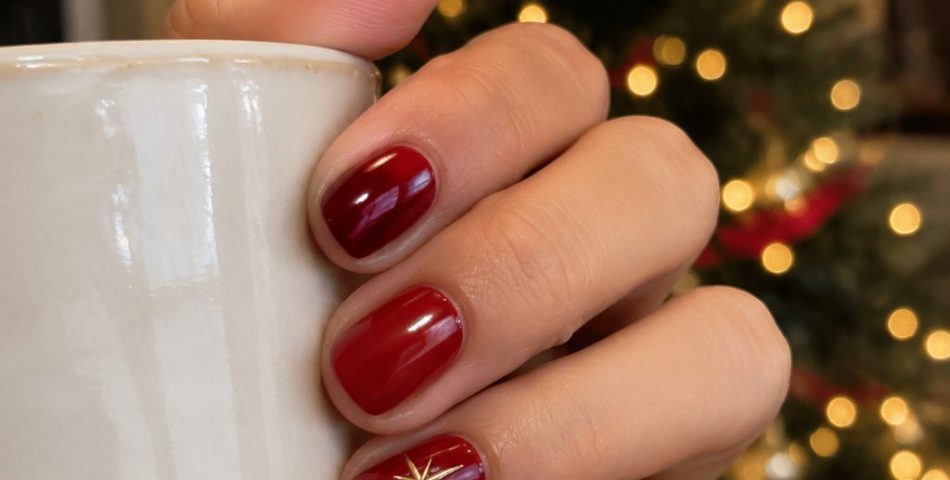
Please note that we do not create all the designs featured in this article. Our primary focus is to curate and collect a diverse range of design collections and products to inspire and share with our audience. While we do not claim ownership or take full credit for the original designs and images, we occasionally make minor adjustments, particularly in home decor and fashion items, to present them more effectively. Additionally, we may produce and edit images to enhance their quality and composition before sharing them on our Pinterest page or website. For the design work we do on these creative designs, we also include our logo on the images shared on Pinterest and our website. This helps our audience recognize that these designs have been published on insiderlyfe.com!
Quick question: when was the last time a complicated nail design actually survived until Christmas Day?
Exactly. Tiny reindeer and hand painted snow globes look amazing on Pinterest, but most of us chip them by the second holiday party.
That’s why simple Christmas nails are having a real moment. One accent nail, a little sparkle, a classic color. Festive enough for photos, easy enough to do on your couch on a Sunday night.
I picked 9 designs that actually look good, take less than an hour and don’t need a steady surgeon’s hand.
Watch for number 4. Candy cane stripes look tricky, but there’s a lazy way to do them that works every time.
And if you want maximum holiday impact for minimum effort, number 9 takes about 25 minutes and looks like you planned it for weeks.
Grab your polish. Let’s get festive.
What you need for simple Christmas nails
You don’t need a full salon kit. Here’s the short list.
- A base coat and a glossy top coat
- 2 or 3 polishes (classic red, a deep green, milky white or sheer pink)
- A gold glitter or shimmer polish
- A dotting tool (or a bobby pin)
- A thin striper brush (or a very fine nail art brush)
- Tiny gold star stickers or nail gems, optional
- Nail polish remover and a small brush for cleanup
Before you start, gently push back your cuticles after a warm shower, but don’t cut them. Dermatologists warn that cutting cuticles can let infection in.
1. Classic red with a tiny gold star
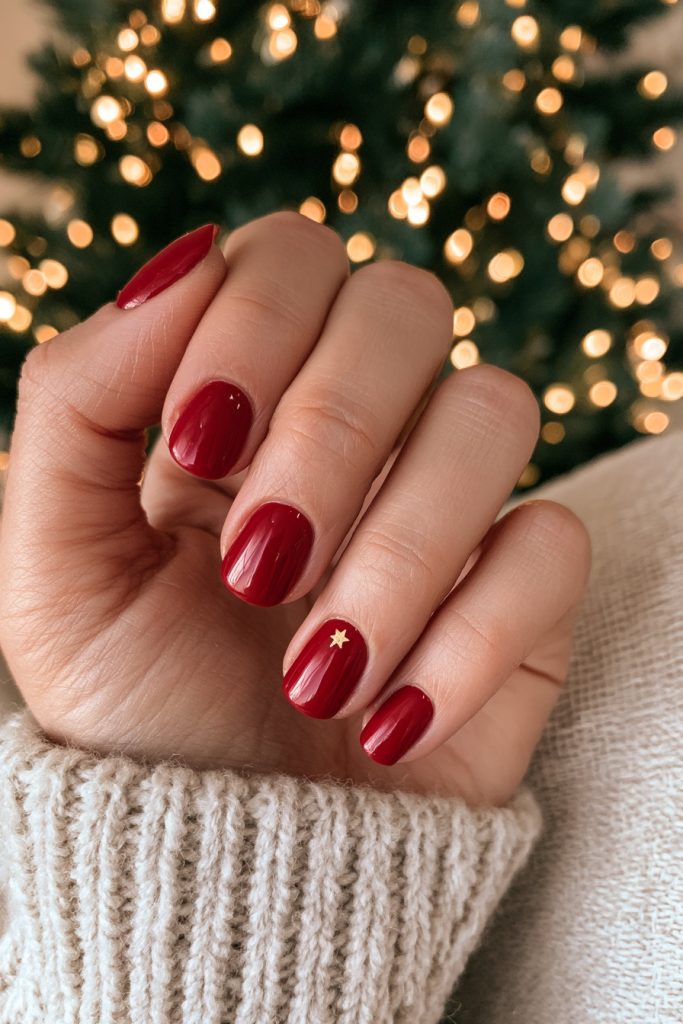
This is the simplest Christmas manicure there is, and it never gets old. Short, glossy red nails with one tiny gold star on the ring finger.
The star is what turns a normal red mani into a Christmas one. It’s subtle, a bit sparkly and very easy to add.
Use a nail sticker or a tiny star stud pressed into wet top coat. No freehand painting needed.
Short nails look especially chic with deep red. It feels classic, almost vintage.
If you don’t have star stickers, a tiny dot of gold glitter polish in the same spot gives a similar effect. Place it close to the cuticle rather than in the center, and it looks more deliberate.
Best for: beginners and anyone who loves a timeless look.
How long it lasts: about 5 to 7 days with regular polish, longer with gel.
Styling tip: go for a blue based red. It looks more festive and makes your hands look brighter in photos.
2. Milky white with dark green french tips
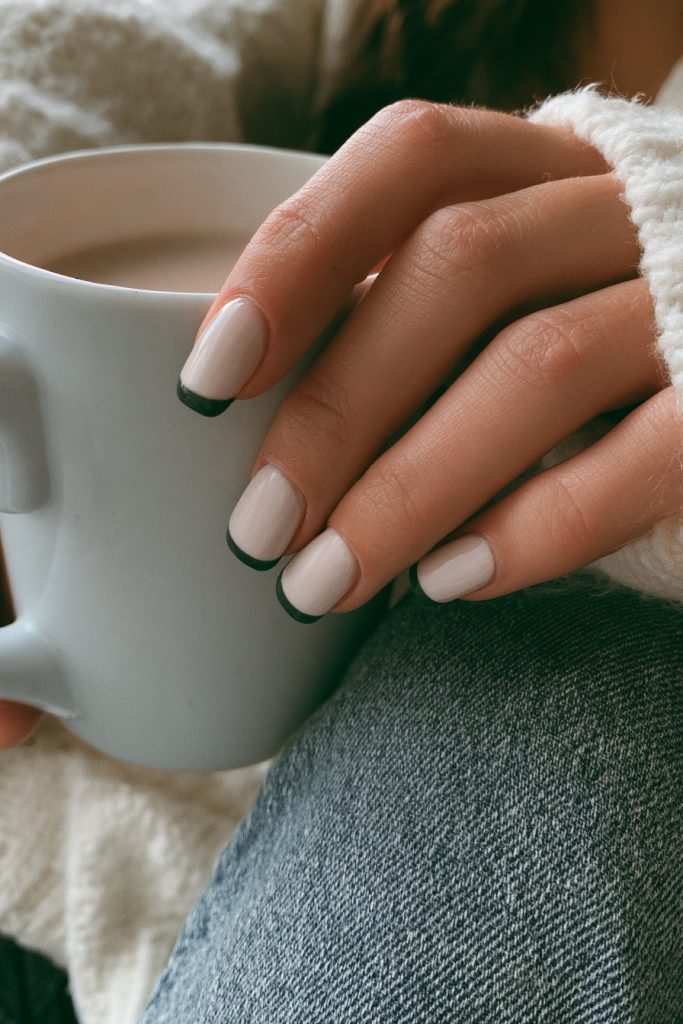
A modern twist on the classic French. Milky white nails with a thin dark green tip.
It’s fresh, clean and quietly festive. Perfect if bright red feels too loud for your office or your style.
The dark green reads like pine trees and feels very winter without screaming Christmas.
Keep the tip line thin. A thin line looks expensive, a thick one looks rushed.
Best for: minimalists and work friendly holiday nails.
How long it lasts: around a week; the tips show chips first, so touch them up mid week.
Styling tip: use a striper brush and paint the line in one smooth swipe from each side to the center.
3. Burgundy with a gold glitter accent
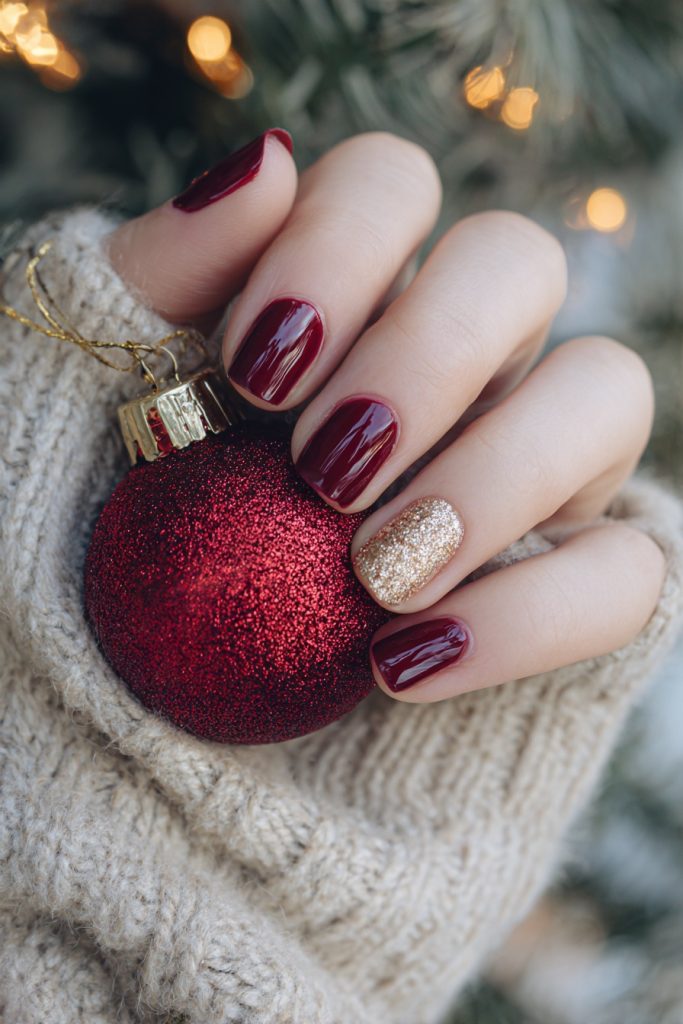
Deep burgundy on four nails, gold glitter on the ring finger. It looks rich and elegant, like a glass of red wine by the fire.
Glitter accent nails are the easiest way to add sparkle. Glitter hides mistakes, so it’s very forgiving for beginners.
Burgundy also lasts longer than bright red visually. Chips are harder to spot on darker shades.
This is a great choice if you’ll be at a lot of parties and dinners.
Best for: holiday parties and dinners.
How long it lasts: about a week.
Styling tip: dab the glitter on with the brush instead of painting it. You’ll get more sparkle with fewer coats.
If you love deep tones, our velvet nails ideas are worth a look too.
4. Candy cane stripes
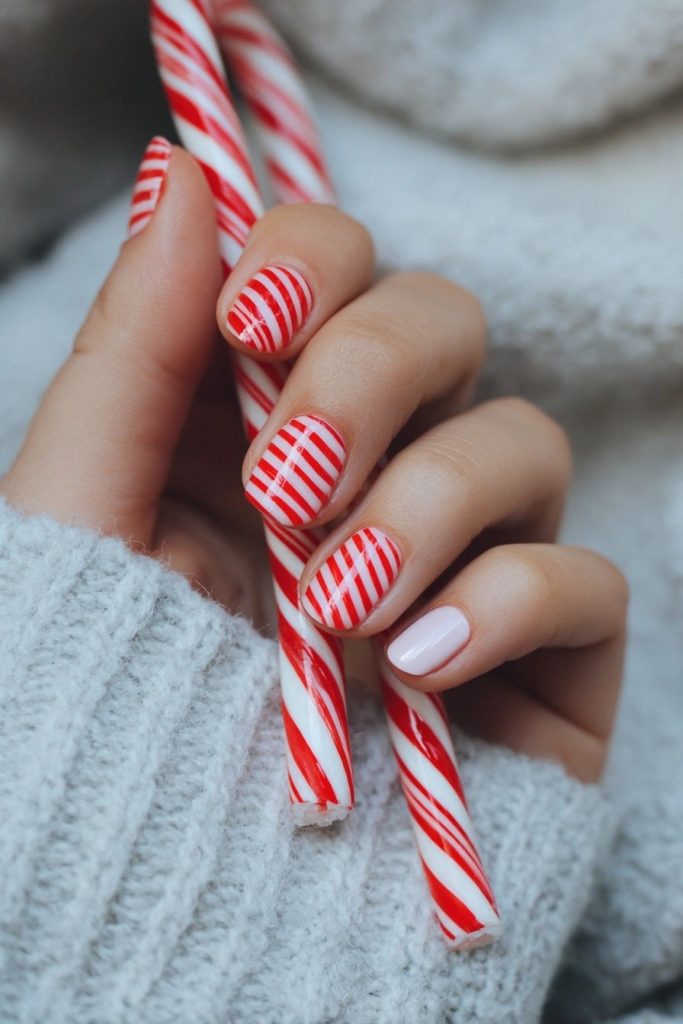
Here’s the one I promised. Red and white diagonal stripes on most of your nails, with one plain pale nail to keep it balanced.
They look complicated, but here’s the lazy trick: paint the nails white first, let them dry fully, then place thin strips of tape diagonally and paint red over the top. Peel the tape off while the red is still slightly wet.
Clean, sharp stripes every time. No shaky lines.
If striping tape feels like too much, just stripe one or two accent nails and keep the rest white.
Best for: fun, playful holiday looks and Christmas parties.
How long it lasts: 5 to 7 days.
Styling tip: keep the stripes going in the same direction on every nail. It looks much more polished.
5. Dark green with tiny gold dots
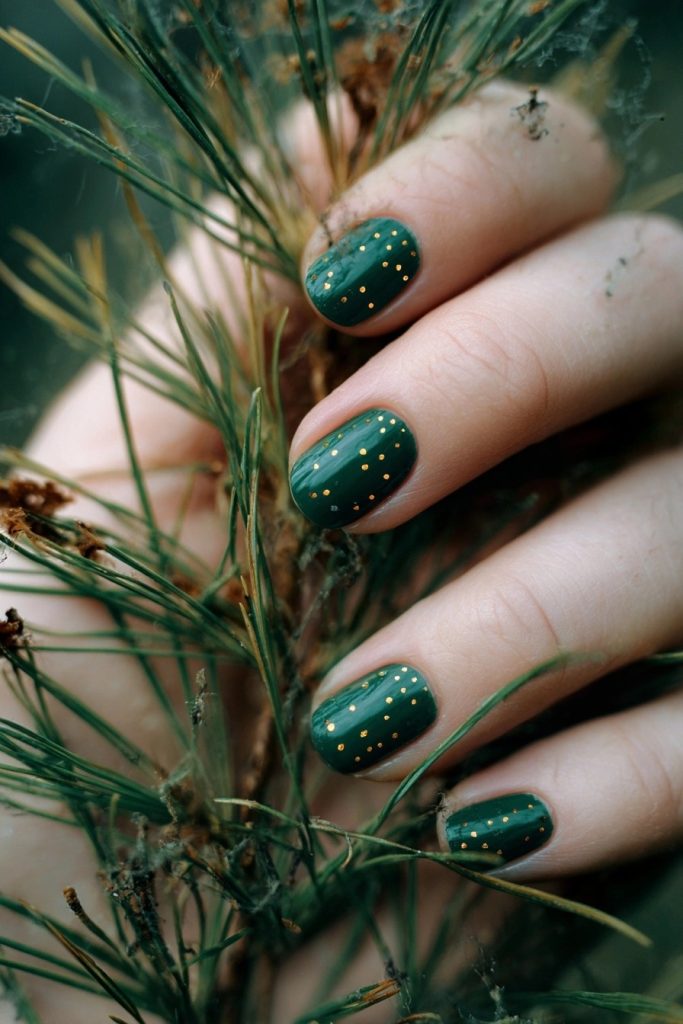
Deep forest green with tiny scattered gold dots. It looks like a Christmas tree with lights, but in the chicest possible way.
The dots are done with a dotting tool or a bobby pin. Dip, dot, done.
Dark green is one of the trendiest holiday shades, and it works on every skin tone.
If you only try one new color this season, make it this one.
It also looks surprisingly good with silver jewelry, which is not something you can say about every Christmas red. Try it with a chunky silver ring for contrast.
Best for: trend lovers and anyone bored of red.
How long it lasts: about a week.
Styling tip: keep the dots random and small. Too many, or too even, and it starts to look like polka dots instead of twinkle lights.
6. Sheer pink with a white snowflake
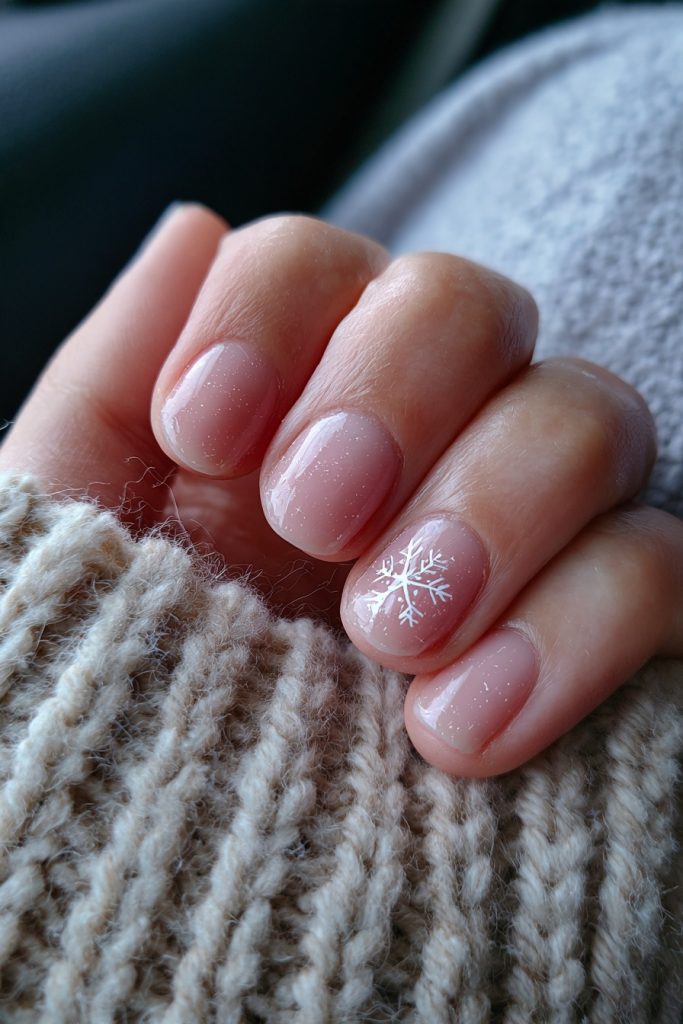
Soft, sheer pink nails with one tiny white snowflake on the ring finger. Pretty, gentle and wintry.
This is the design for people who don’t really like “Christmas nails” but still want something seasonal.
The snowflake is just a few short lines and dots. Start with an X, add a line through the middle, then a dot at each end.
It also works well into January, so you get more wear from one manicure. Add a second snowflake on the other hand if you want a little more winter feeling without much extra work.
Best for: soft, natural looking nails and short nails.
How long it lasts: about a week; sheer pink hides regrowth nicely.
Styling tip: use a white polish with a thin consistency for the snowflake. Thick polish turns lines into blobs.
Halfway there. Remember number 9, the 25 minute look? It’s coming up.
7. Champagne shimmer
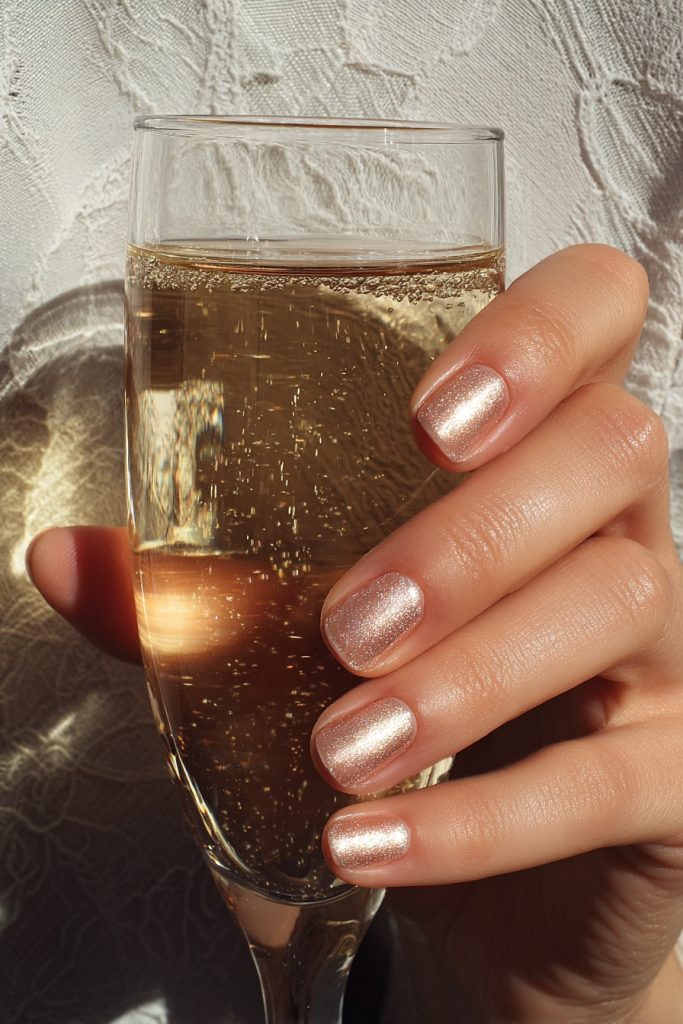
Shimmery champagne gold on every nail. That’s it, and it’s gorgeous.
This is the perfect New Year’s Eve manicure, but it works from early December too.
Champagne shimmer is one of the most forgiving finishes there is. Streaks and small mistakes basically disappear.
It also flatters almost every skin tone. Warm, soft and festive without being loud.
Best for: New Year’s Eve and anyone who wants low effort sparkle.
How long it lasts: 5 to 7 days, and chips are barely noticeable.
Styling tip: two thin coats and a glossy top coat give a smooth, glassy finish.
8. Soft pink with a red heart
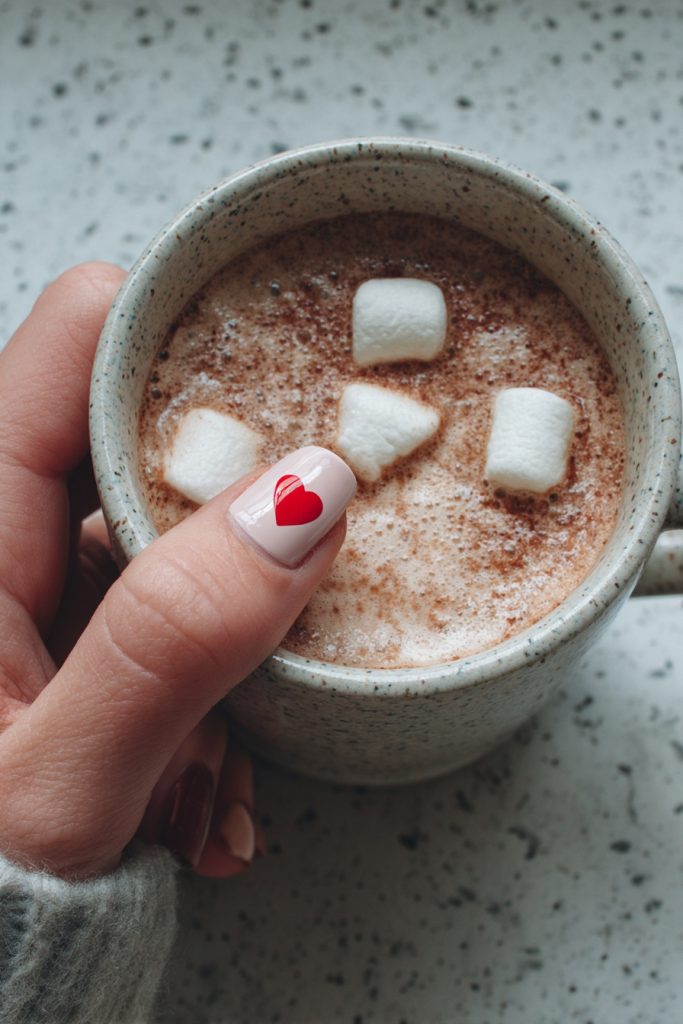
Soft pale pink nails with a tiny red heart on the thumb or ring finger. Cute, cozy and very hot chocolate season.
Hearts are surprisingly easy. Make two red dots side by side with a dotting tool, then drag each one down to a point.
This design feels sweet and a little playful, and it carries straight through to Valentine’s Day.
It’s also great if you want something festive but not obviously Christmas.
Best for: cozy, cute looks that last past the holidays.
How long it lasts: about a week.
Styling tip: keep the heart small and slightly off center. It looks more charming and less like a sticker.
9. Glossy red with gold rings
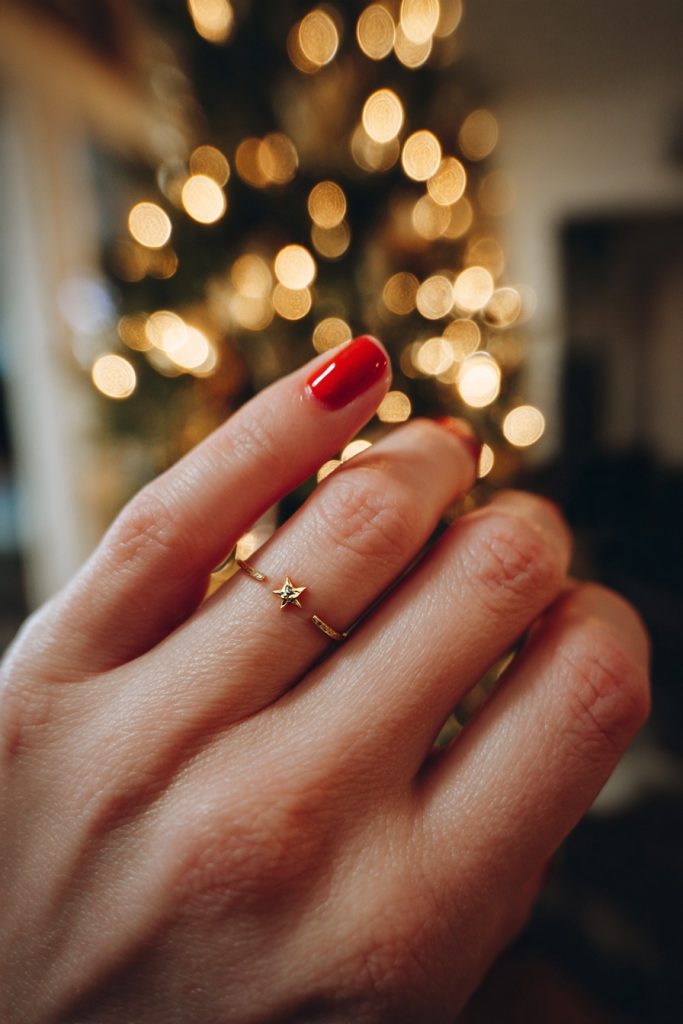
The 25 minute showstopper. Glossy red on every nail, then let your jewelry do the work.
A dainty gold ring, especially one with a little star, makes a plain red manicure look completely styled.
This is the easiest way to look polished at a holiday party. No nail art at all, just good polish, a thick top coat and a couple of pretty rings.
Honestly, this is my favorite trick for busy Decembers.
Best for: busy people and last minute plans.
How long it lasts: 5 to 7 days.
Styling tip: stack thin rings rather than wearing one chunky one. It looks delicate and feminine.
Simple Christmas nails at a glance
| Design | Skill level | Time | Best for |
|---|---|---|---|
| 1. Red + tiny gold star | Easy | 30 to 40 min | Classic look |
| 2. Green french tips | Medium | 40 to 50 min | Work friendly |
| 3. Burgundy + glitter accent | Easy | 30 to 40 min | Parties |
| 4. Candy cane stripes | Medium | 45 to 60 min | Fun and festive |
| 5. Green + gold dots | Easy | 35 to 45 min | Trendy |
| 6. Snowflake accent | Easy | 35 min | Soft and wintry |
| 7. Champagne shimmer | Easy | 25 to 30 min | New Year’s Eve |
| 8. Pink + red heart | Easy | 35 min | Cozy and cute |
| 9. Red + gold rings | Easiest | 25 to 30 min | Last minute |
Step by step: how to do any of these at home
- Prep: gently push back cuticles, file nails short and smooth, and wipe each nail with alcohol.
- Base coat: one thin layer. Let it set for 2 minutes.
- Color: two thin coats, with 2 to 3 minutes between each.
- Details: add stars, dots, stripes or glitter on one or two accent nails.
- Top coat: seal everything and run the brush along the free edge of each nail.
- Dry: hands off for at least 15 minutes. Polish is fully hard after about an hour.
How to make your manicure last through the holidays
- Reapply top coat every 2 to 3 days.
- Wear gloves when washing dishes. Hot water is a manicure killer.
- Keep a small bottle of your color in your bag for quick touch ups.
- Use cuticle oil every night. Hydrated nails chip less.
- Avoid using your nails as tools to open gifts. Tape is tougher than you think.
If you want something that lasts longer, our press on nails vs salon gel guide compares the options.
Simple Christmas nails for short nails
Short nails are perfect for holiday designs. They look neat, they’re practical for wrapping gifts, and they make small details look intentional.
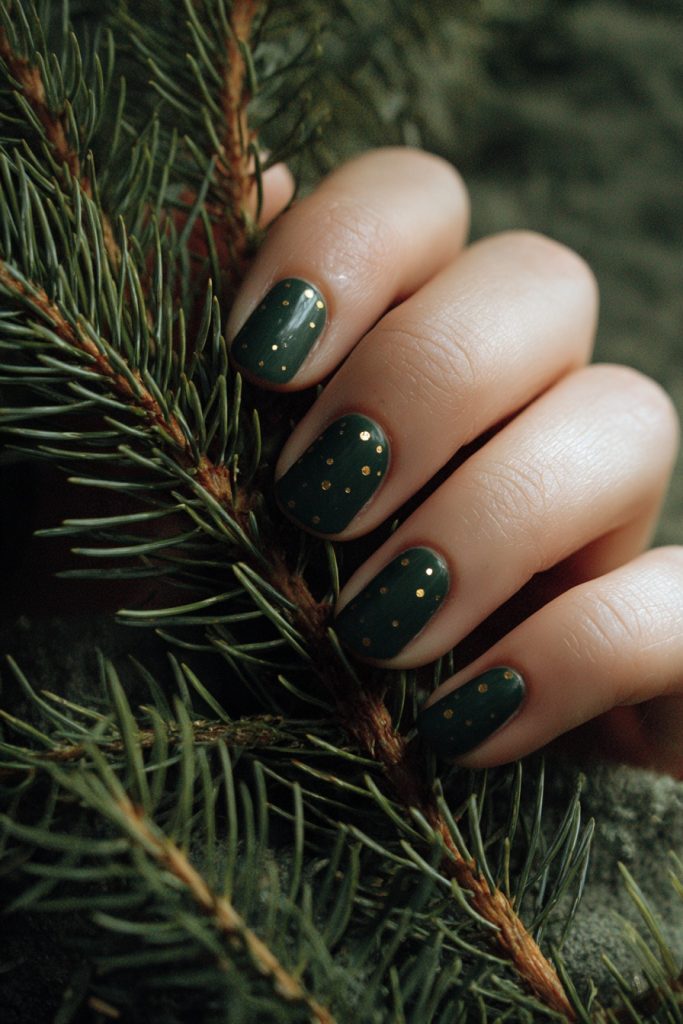
A few rules make short nails look their best:
- Pick one accent nail per hand, not three. Small canvases get busy fast.
- Choose deep, glossy shades. Red, burgundy and dark green look rich on short nails.
- Keep details tiny. A single star, a few dots or a small heart is enough.
- File a soft round or squoval shape. It looks clean and resists chipping.
Designs 1, 3, 5, 6 and 9 above all work beautifully on very short nails.
Regular polish or gel for the holidays?
Regular polish is cheap, quick and easy to change if you want a new look for New Year’s Eve. The downside is that it usually lasts about 5 to 7 days.
Gel lasts around 2 to 3 weeks, so it can carry you from early December parties through to Christmas Day. It does need a UV or LED lamp, and removal takes longer.
A good middle ground is a gel effect top coat over regular polish. It adds shine and a few extra days of wear without a lamp.
If you’re doing your nails only once this month, gel or a salon manicure is worth it. If you like changing designs, stick with regular polish.
Common mistakes to avoid
- Painting thick coats. Thin layers dry faster and chip less.
- Skipping the base coat. Deep reds and greens can stain your nails.
- Adding too much nail art. One festive accent beats ten busy nails.
- Forgetting to cap the edges with top coat. That’s where chips start.
- Rushing the dry time. Wait before you touch your phone, open doors or wrap presents.
What to say at the salon
Prefer someone else to do it? Copy this and show your nail tech.
“Hi! I’d like a simple Christmas manicure on short, rounded nails. Glossy red on all nails, with one tiny gold star on each ring finger. Nothing too busy. Could you also seal the edges well so it lasts through the holidays?”
Swap the color and accent to match any design above. Clear instructions save time and money.
Simple Christmas nail ideas by occasion
- Office party: milky white with green french tips (number 2) or champagne shimmer (number 7).
- Family dinner: classic red with a tiny gold star (number 1).
- Ugly sweater party: candy cane stripes (number 4).
- Cozy night in: sheer pink snowflake (number 6) or the red heart (number 8).
- New Year’s Eve: champagne shimmer or burgundy with glitter (numbers 7 and 3).
Not sure what to wear with your new nails? A red or gold manicure looks great with almost any holiday outfit, but deep green really pops against cream knits and camel coats.
Christmas nail colors that always work
- Classic red: the ultimate festive shade.
- Burgundy: rich, elegant and forgiving.
- Forest or emerald green: modern and trendy.
- Milky white: clean, wintry and perfect for nail art.
- Champagne or gold shimmer: instant party mode.
Love dark shades? Our dark red nails ideas and deep teal nails ideas have more inspiration.
Save this: simple Christmas nails step card
Here’s a free step card with all 9 designs, the skill level, how long each takes, what you need and the step by step routine. Save it to your phone or print it for your nail station.
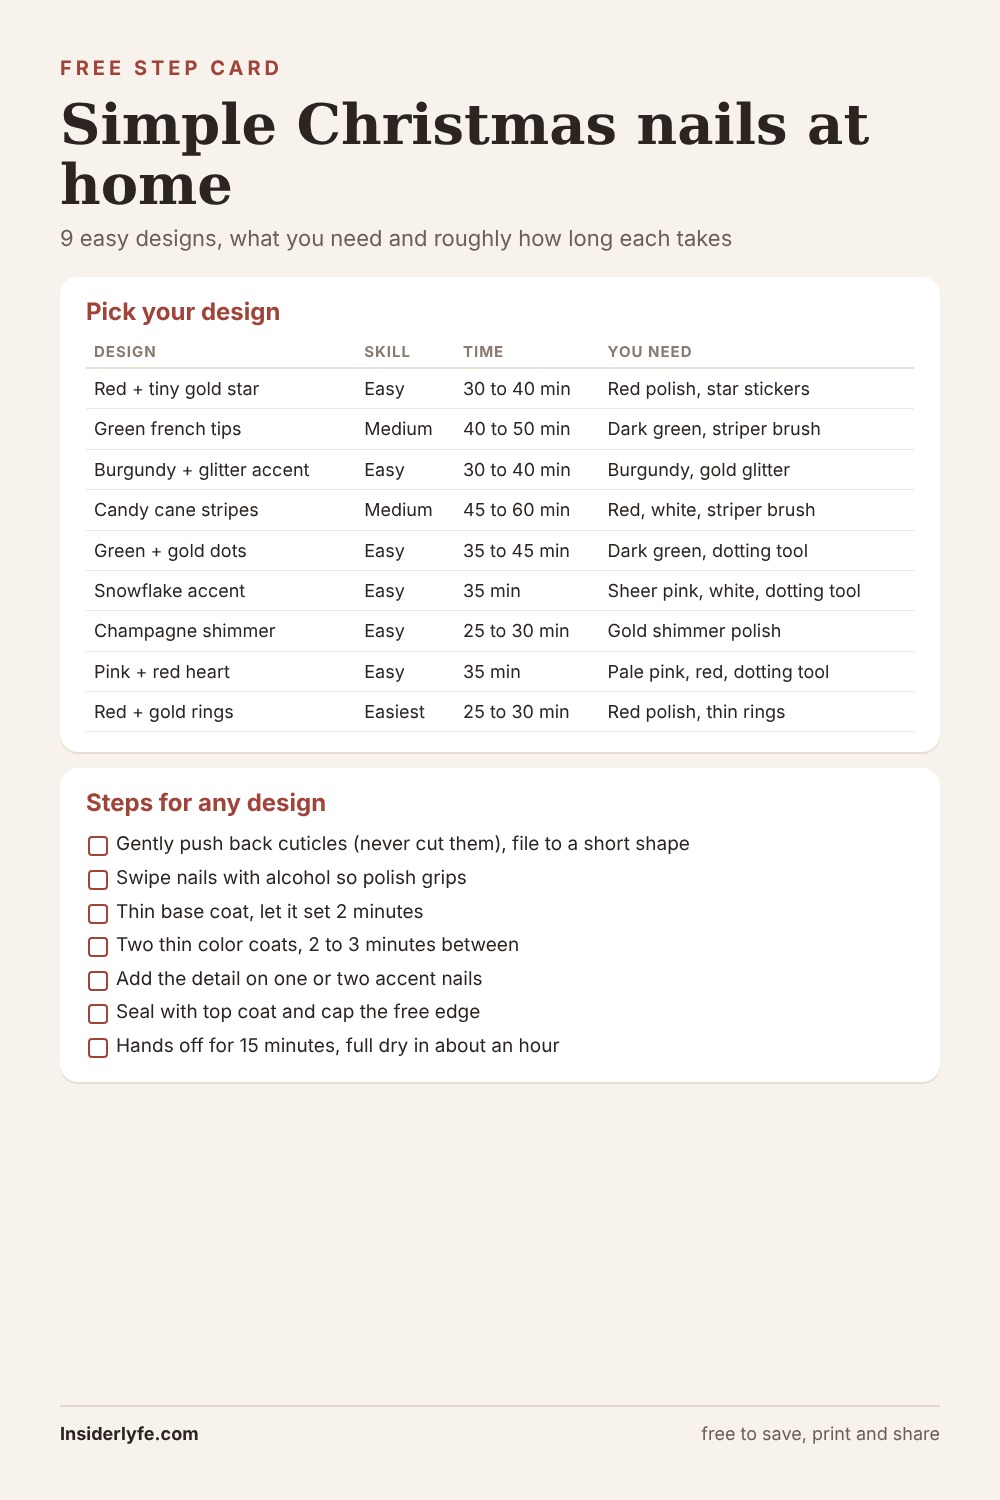
Download the full-size step card (free, no email needed)
Frequently asked questions
What are the easiest Christmas nails to do at home?
Classic red with a gold star sticker, champagne shimmer and red with gold rings are the easiest. They need no freehand art at all.
What nail shape is best for Christmas nails?
Short, rounded or almond nails look modern and last longer. Very long nails chip and break more easily during the busy holiday season.
How do I make simple Christmas nails look expensive?
Pick a rich color, keep designs minimal, use a glossy top coat and add one small accent. Less is more.
Can I do Christmas nail art without special tools?
Yes. Use a bobby pin for dots, tape for stripes and a toothpick for tiny details.
How long before Christmas should I do my nails?
Two to three days before is ideal for regular polish. Gel can be done about a week before.
The bottom line
Simple Christmas nails are all about one good color and one small festive detail. Pick a design that matches your skill level and how much time you have, and you’ll have holiday ready nails in under an hour.
For healthy nails under all that polish, the American Academy of Dermatology’s nail care tips are worth a quick read.
If you liked this, you might also enjoy our holographic nails ideas.
Which design are you trying first?
Related Post