
Please note that we do not create all the designs featured in this article. Our primary focus is to curate and collect a diverse range of design collections and products to inspire and share with our audience. While we do not claim ownership or take full credit for the original designs and images, we occasionally make minor adjustments, particularly in home decor and fashion items, to present them more effectively. Additionally, we may produce and edit images to enhance their quality and composition before sharing them on our Pinterest page or website. For the design work we do on these creative designs, we also include our logo on the images shared on Pinterest and our website. This helps our audience recognize that these designs have been published on insiderlyfe.com!
Most of us learned exactly one braid as kids and never questioned it. Meanwhile, there is a whole menu of braids out there, and each one solves a different hair problem: frizz, length, heat, boredom, or a wedding next Saturday.
This guide walks through eight braid types, with what each one looks like, how long it takes, how long it lasts and the mistake to avoid. Two spots to bookmark: number 4, the cornrow, for anyone who wants a style that lasts for weeks, and number 7, the bold colour braid, for when you want a statement.
One safety note before the fun part. Braids look best and are best for your hair when they are comfortable, and I have put the dermatologist advice in its own section near the end. Read it before you book anything long term.
Braid types at a glance
| Braid | Time | Lasts about | Skill |
|---|---|---|---|
| Classic three strand | About 10 minutes | 1 day | Beginner |
| Low single braid | About 10 minutes | 1 day | Beginner |
| Crown braids into a low bun | About 30 minutes | 1 to 2 days | Intermediate |
| Cornrows | About 2 to 4 hours | Up to 6 to 8 weeks | Professional |
| Long braids with extensions | About 4 to 8 hours | Up to 6 to 8 weeks | Professional |
| Twists | About 4 to 7 hours | Up to 6 to 8 weeks | Professional |
| Colour braids | About 4 to 8 hours | Up to 6 to 8 weeks | Professional |
| Loose floral braid | About 45 minutes | 1 day | Intermediate |
1. The classic three strand braid: where everything starts
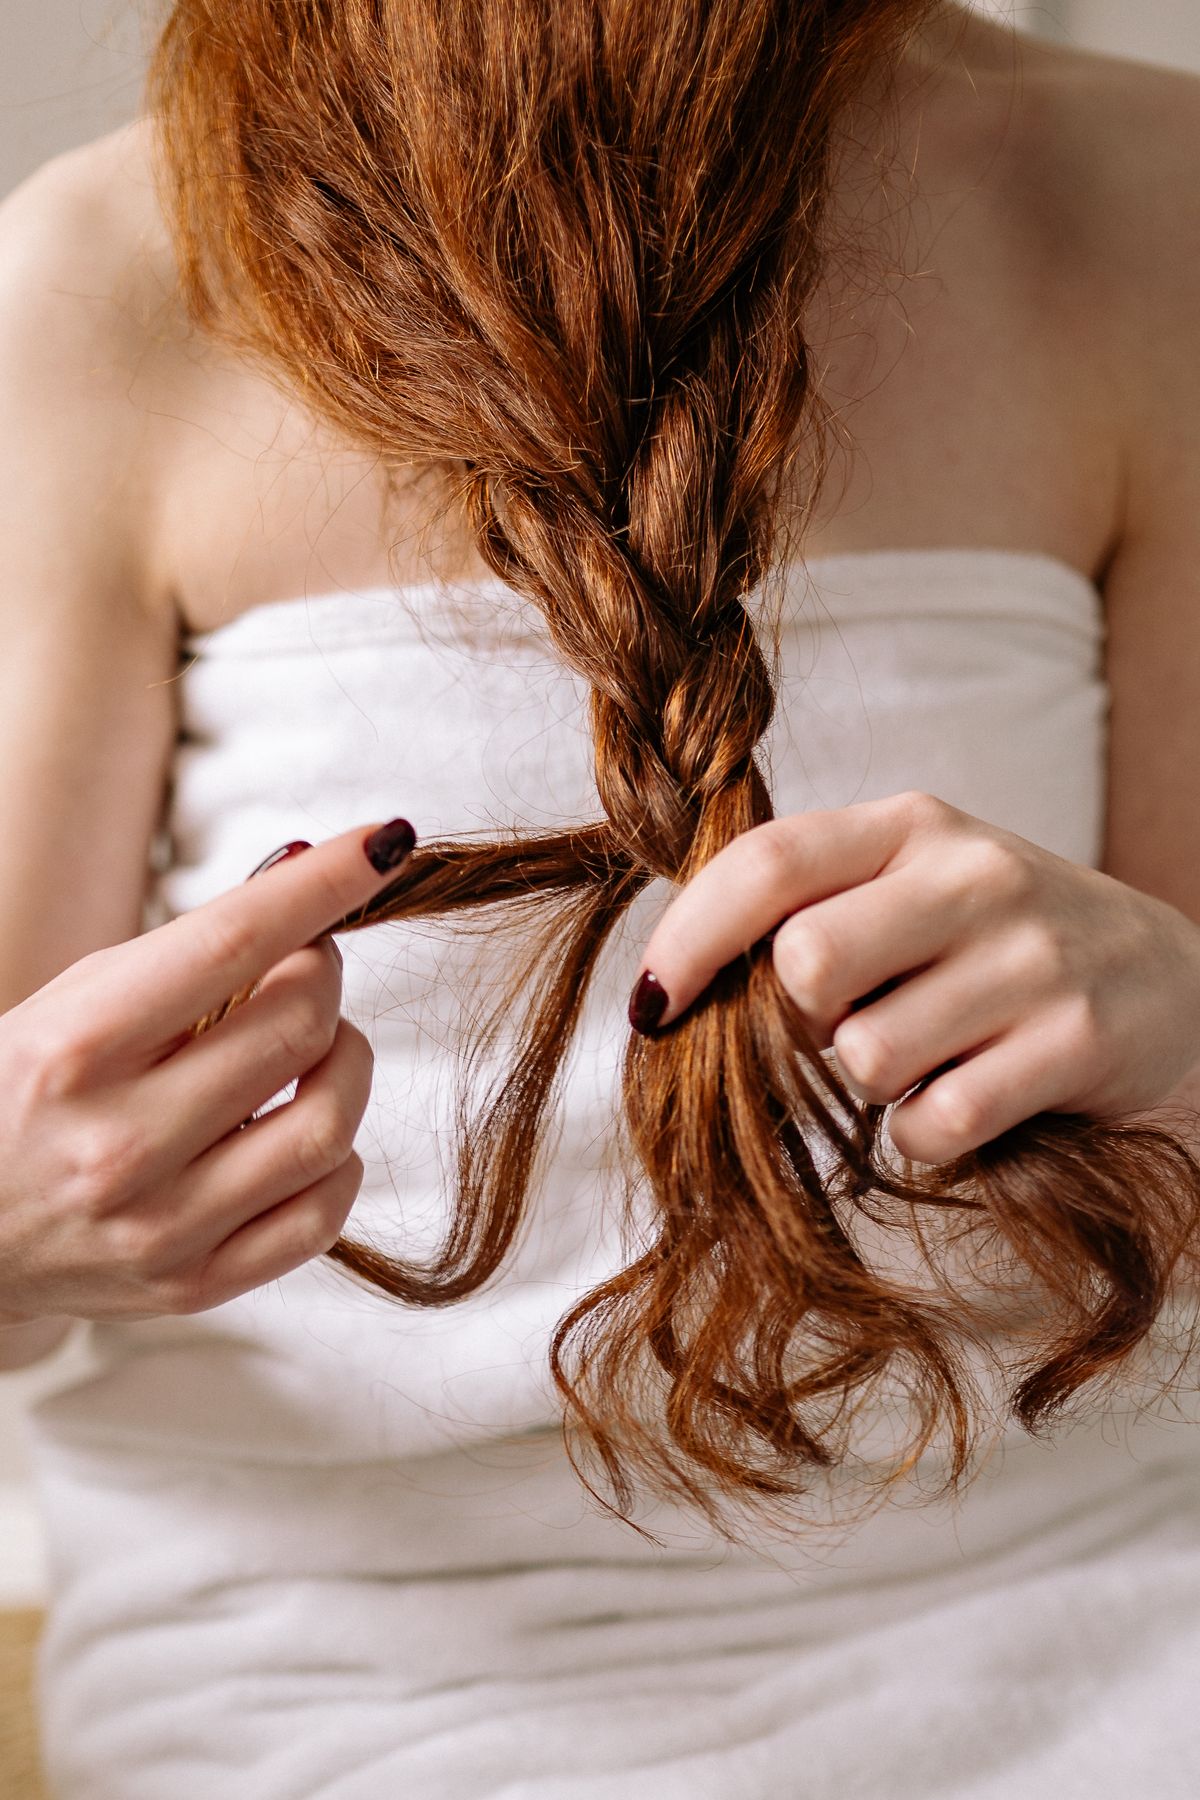
Everything else on this list is a variation on this one. Split the hair into three sections, cross the right over the middle, then the left over the middle, and repeat down the length.
It is not glamorous, but it is the most useful braid you will ever learn. It keeps long hair out of your face, protects the ends from rubbing on clothing and gives you pretty waves when you take it out.
If you are new to it, practise on damp, brushed hair. It is far easier to control than dry, slippery hair.
Best for: beginners, sleeping in, and hair that needs a break from heat.
Time and upkeep: Takes about 10 minutes. Secure the end with a soft tie, and do not braid tight.
Styling tip: Pull the sections slightly apart after braiding for a fuller, softer look.
2. The low single braid: sleek and weirdly professional
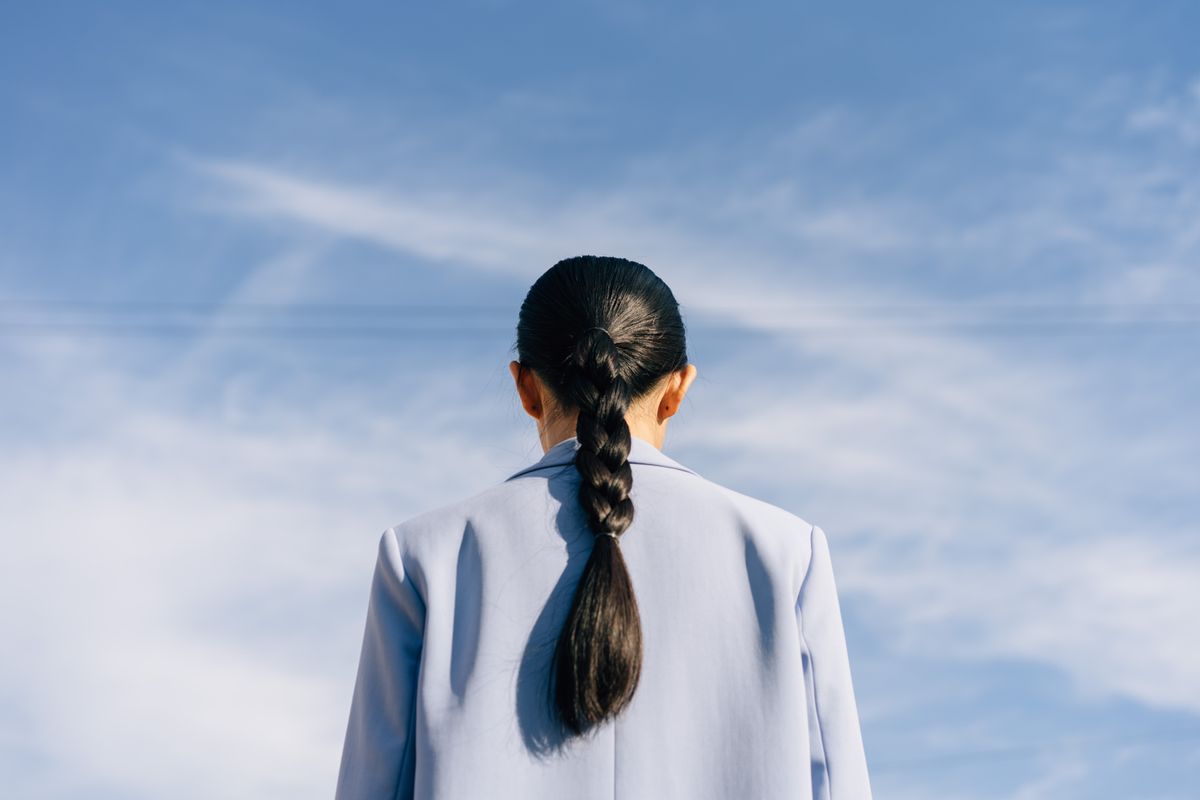
Take the same braid, start it low at the nape and keep it neat, and it suddenly looks polished enough for the office. The result is a clean line down the back that works well with a blazer.
This is the version I would suggest to anyone who thinks braids are too casual for work. It looks controlled, it is quick, and it stays tidy all day.
Smooth the top with a little cream, and keep the braid even all the way down so the finish looks crisp.
Best for: work, travel, and anyone who likes a clean look.
Time and upkeep: Takes about 10 minutes. Re-braid the ends if they start to loosen.
Styling tip: Finish with a thin hair tie in a matching colour and hide it with a wrapped strand.
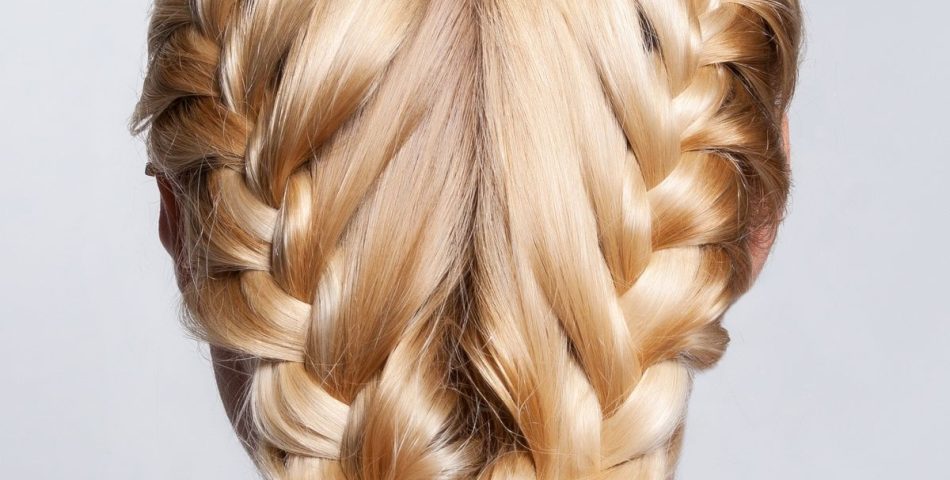
3. Crown braids into a low bun: the show off style
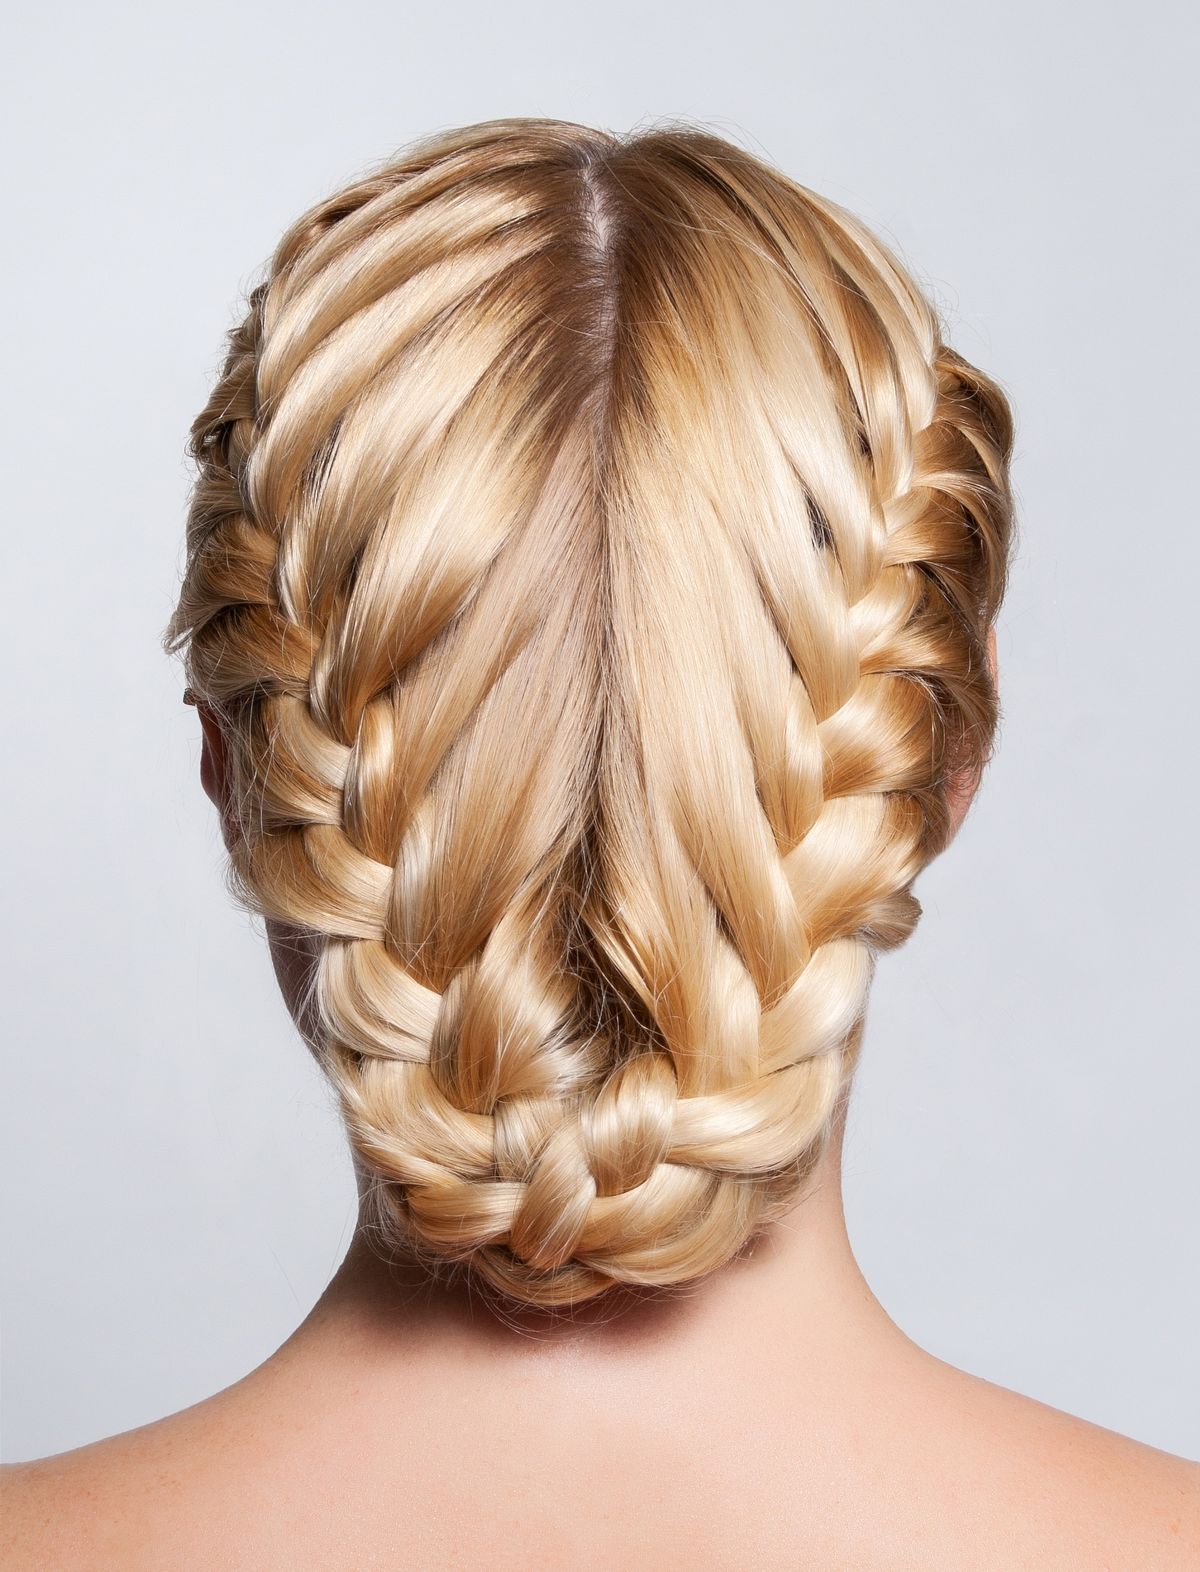
This is the braid that makes people ask if you went to a salon. Two braids run along the head from either side and join into a woven low bun at the nape.
It takes patience, but the pay off is a style that stays neat for a long time and looks special enough for a wedding or a party.
If you are doing it yourself, practise with a friend or a mirror first, and use plenty of pins to keep the shape.
Best for: parties, weddings, and days you want a style that stays put.
Time and upkeep: Takes about 30 minutes. Hair pins and a light hairspray keep it neat.
Styling tip: Start the braids a little higher than you think, so the crown shape sits properly.
4. Cornrows: the long lasting classic
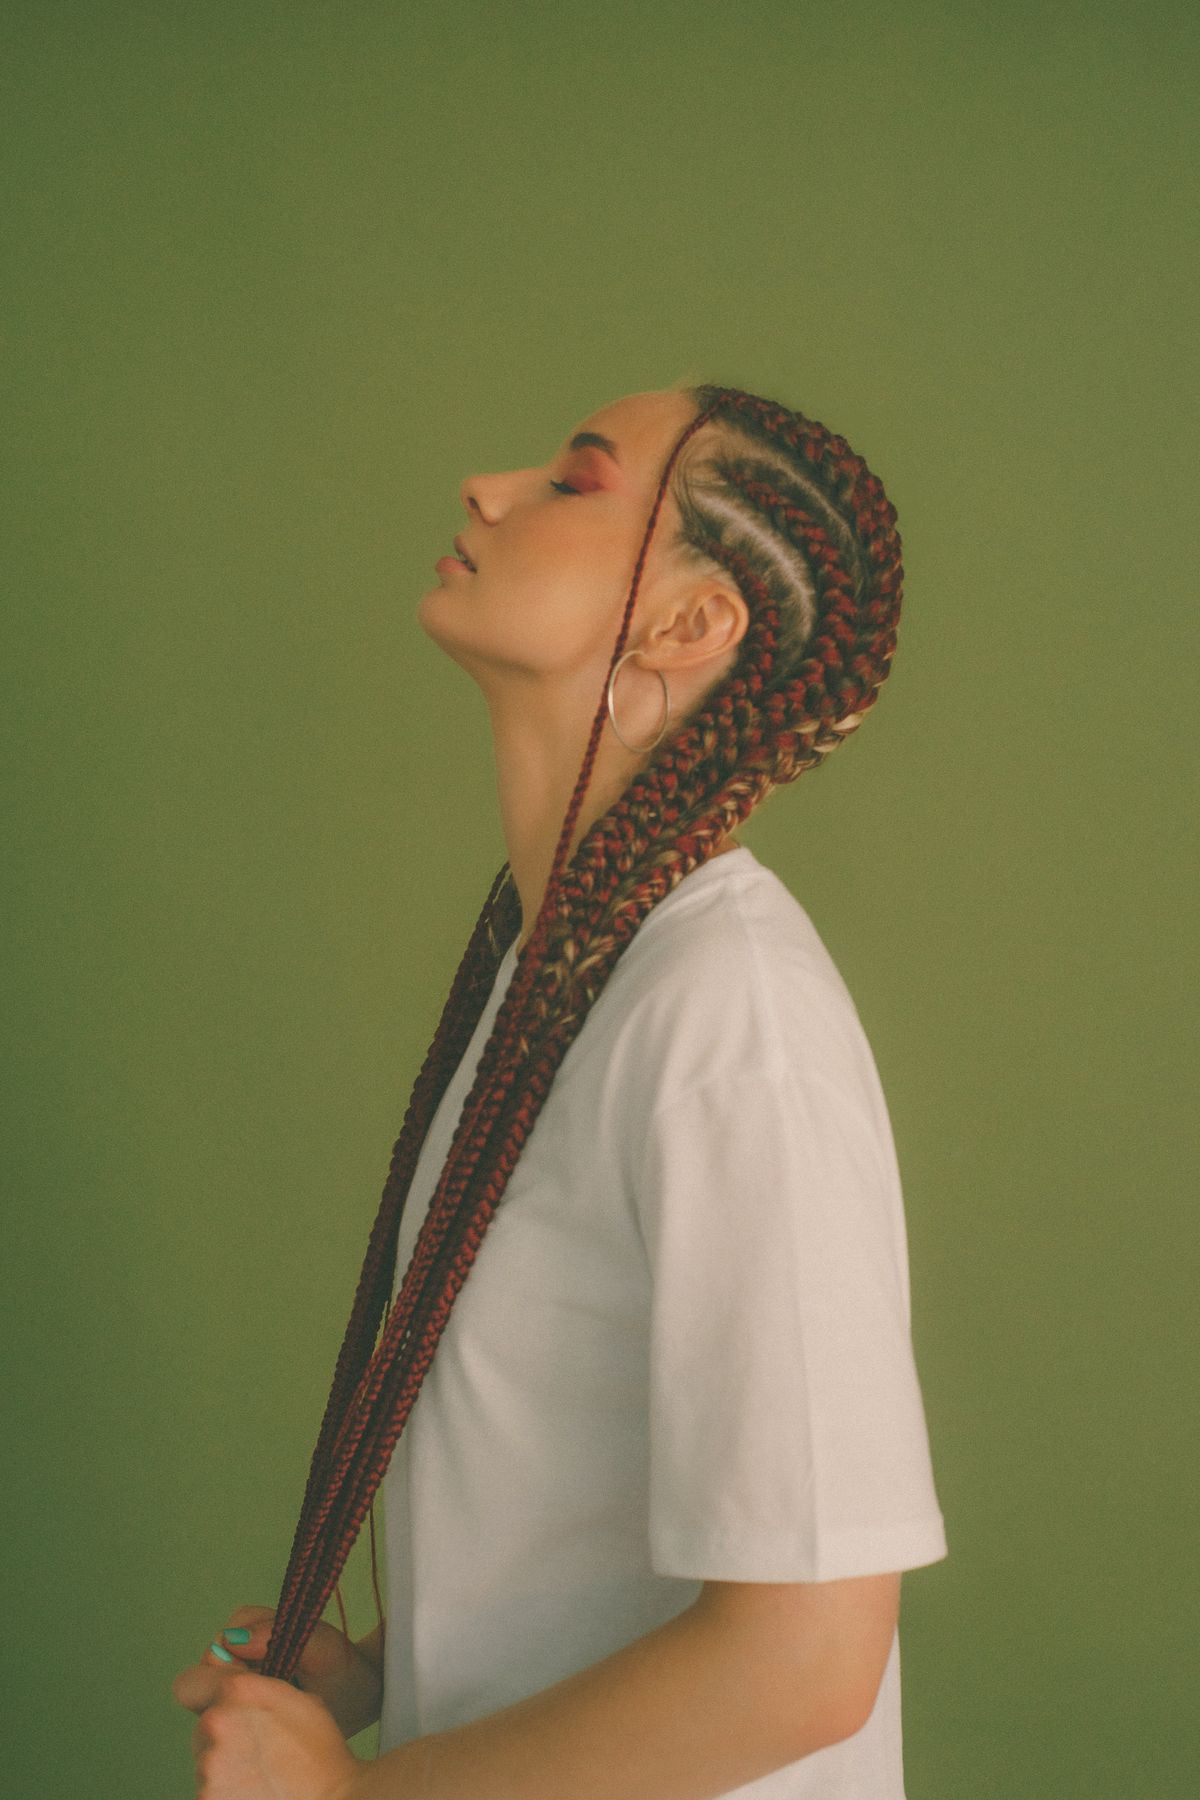
Cornrows are braids worked flat against the scalp in rows, and they are one of the oldest and most practical braided styles there is. They keep the hair neat for weeks, and they can be styled in lines, curves or patterns.
This look has cornrows leading into long braided lengths with dark red extensions. It is a good reminder that cornrows are both practical and a strong style statement.
Go to an experienced braider, and tell them clearly that you want them comfortable, not tight. That one sentence protects your hairline.
Best for: low maintenance weeks, travel, and anyone who wants a bold look.
Time and upkeep: Takes about 2 to 4 hours. Moisturise the scalp and keep your edges gentle.
Styling tip: Wrap them in a silk or satin scarf at night to prevent frizz.
5. Long braids with cornrows at the front: tidy lines, big impact
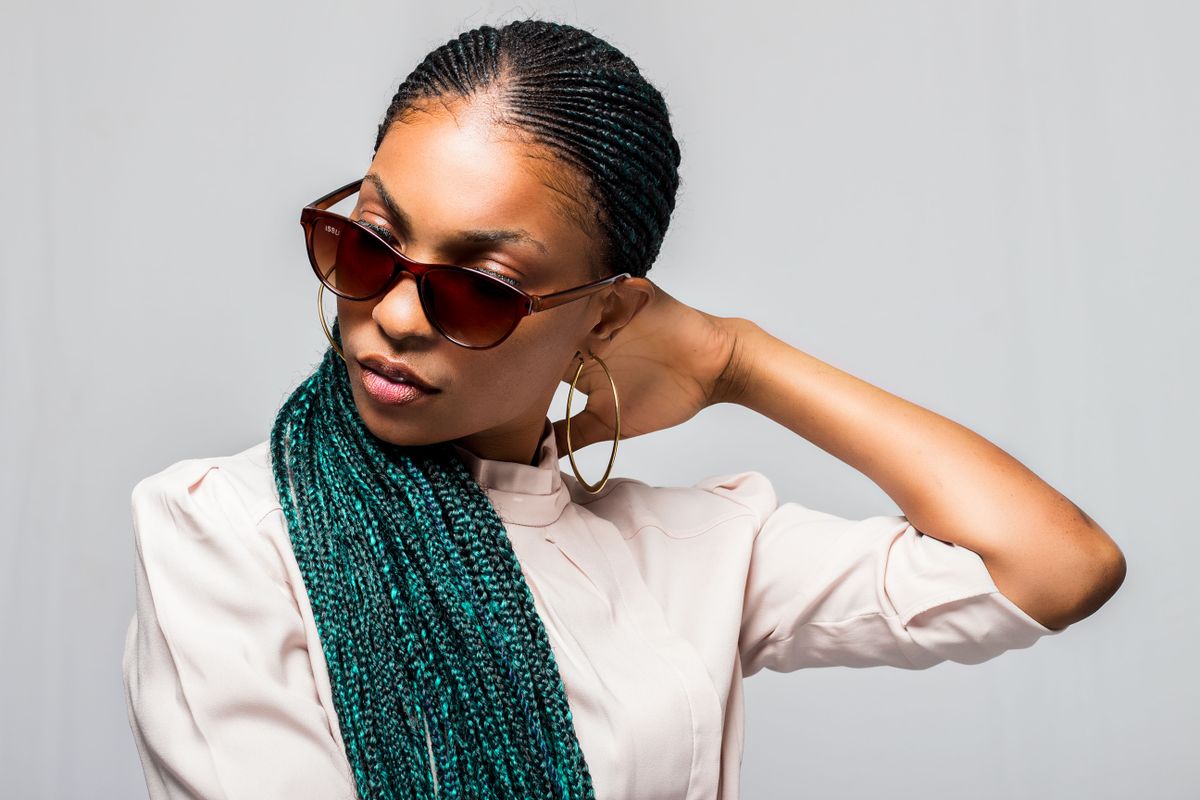
This look pairs fine cornrows at the front with long braids in a rich teal green. Neat lines at the hairline and bold length is a combination that works for almost any outfit.
Colour like this is a good way to try something bold, because it sits in the braids rather than your own hair. When you are bored of it, you take it out.
If you are choosing extensions, pick lightweight hair, since heavy braids can pull on the scalp.
Best for: anyone who wants colour without dye.
Time and upkeep: Takes about 4 to 8 hours. Wash the scalp gently and keep the braids dry between washes.
Styling tip: Use a lightweight oil on the scalp, not the braids, to avoid buildup.
6. Twists: texture and movement
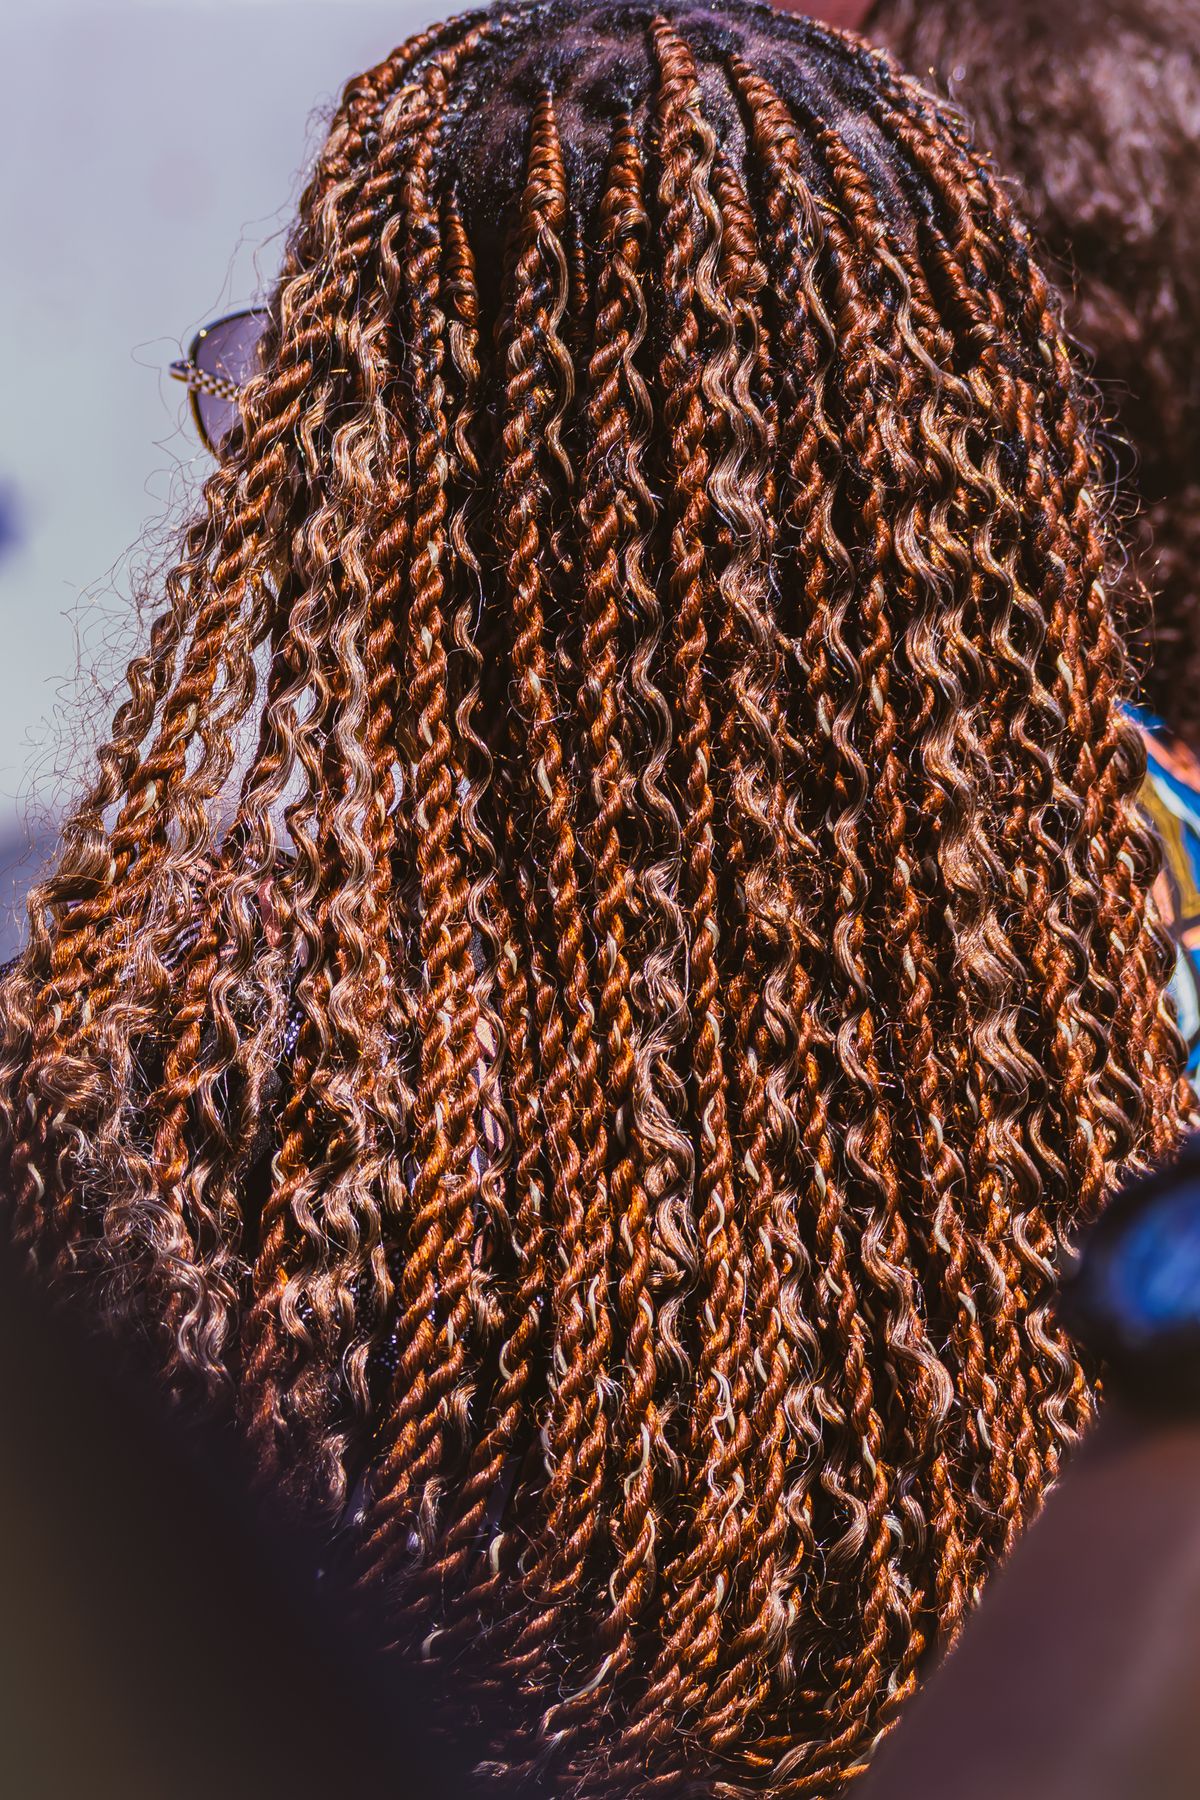
Twists are made by wrapping two strands around each other, and they give a textured, spiral finish. This long auburn set has a rope like pattern that catches the light.
They are lighter than many braids and often feel easier to move in. They also look great loose or pinned up in a bun.
Take care at the roots, and tell your stylist if anything feels tight.
Best for: textured, flowing styles that last a while.
Time and upkeep: Takes about 4 to 7 hours. Keep the scalp moisturised and avoid heavy products.
Styling tip: Pin the twists in a high bun for a fresh look that keeps them off your neck.
7. Colour braids: the statement style
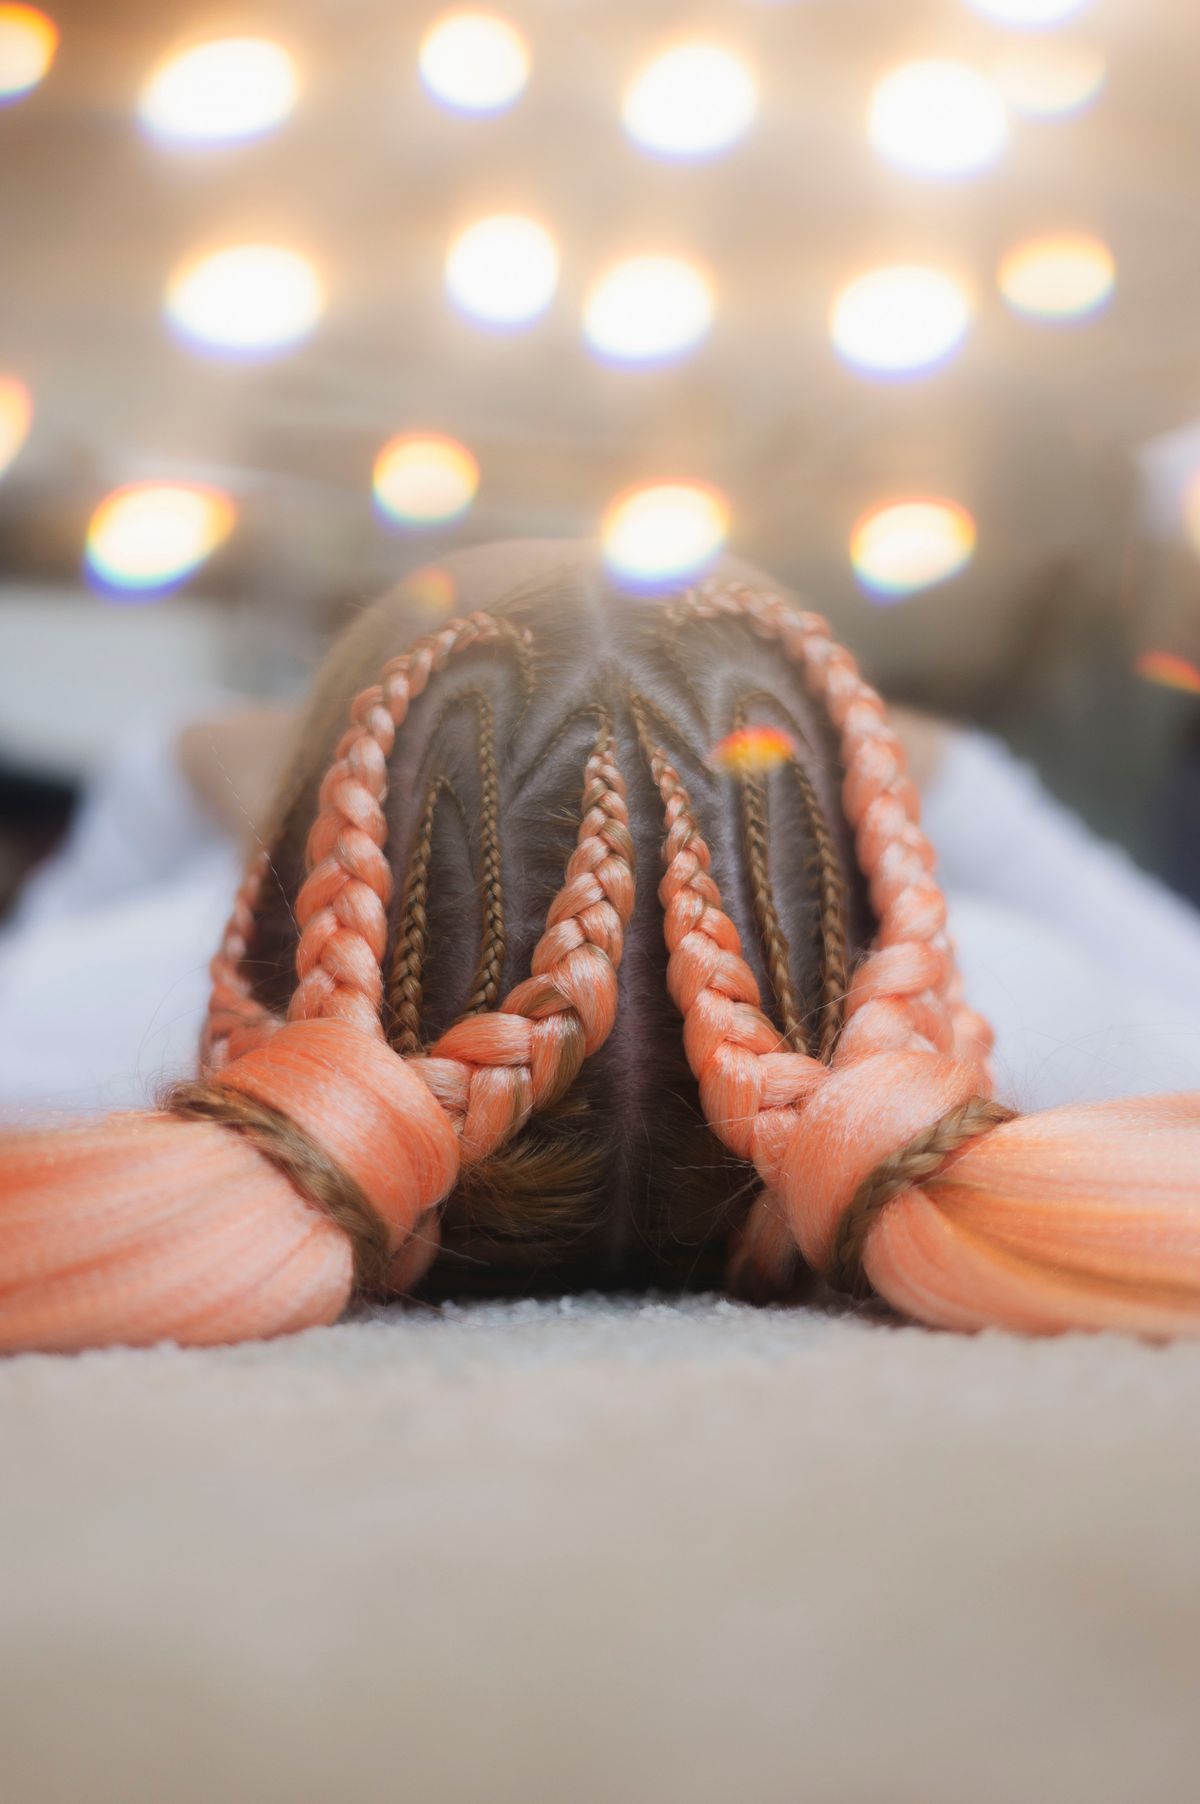
This look shows cornrows leading into long braids with coral pink extensions. It is a vivid example of how colour can change a braided style without touching the natural hair.
If you have wanted to try pink, blue or green, braids are the safe way to test it. A colour that does not suit you is only a few weeks, not a few months.
Ask to see a sample of the extension hair before you book, and choose a shade close to your skin tone’s undertone for the most flattering result.
Best for: bold, creative styles and festivals.
Time and upkeep: Takes about 4 to 8 hours. Follow your braider’s care advice, and take them out on time.
Styling tip: Match your outfit to one colour in the braids for a pulled together look.
8. The loose floral braid: made for special occasions
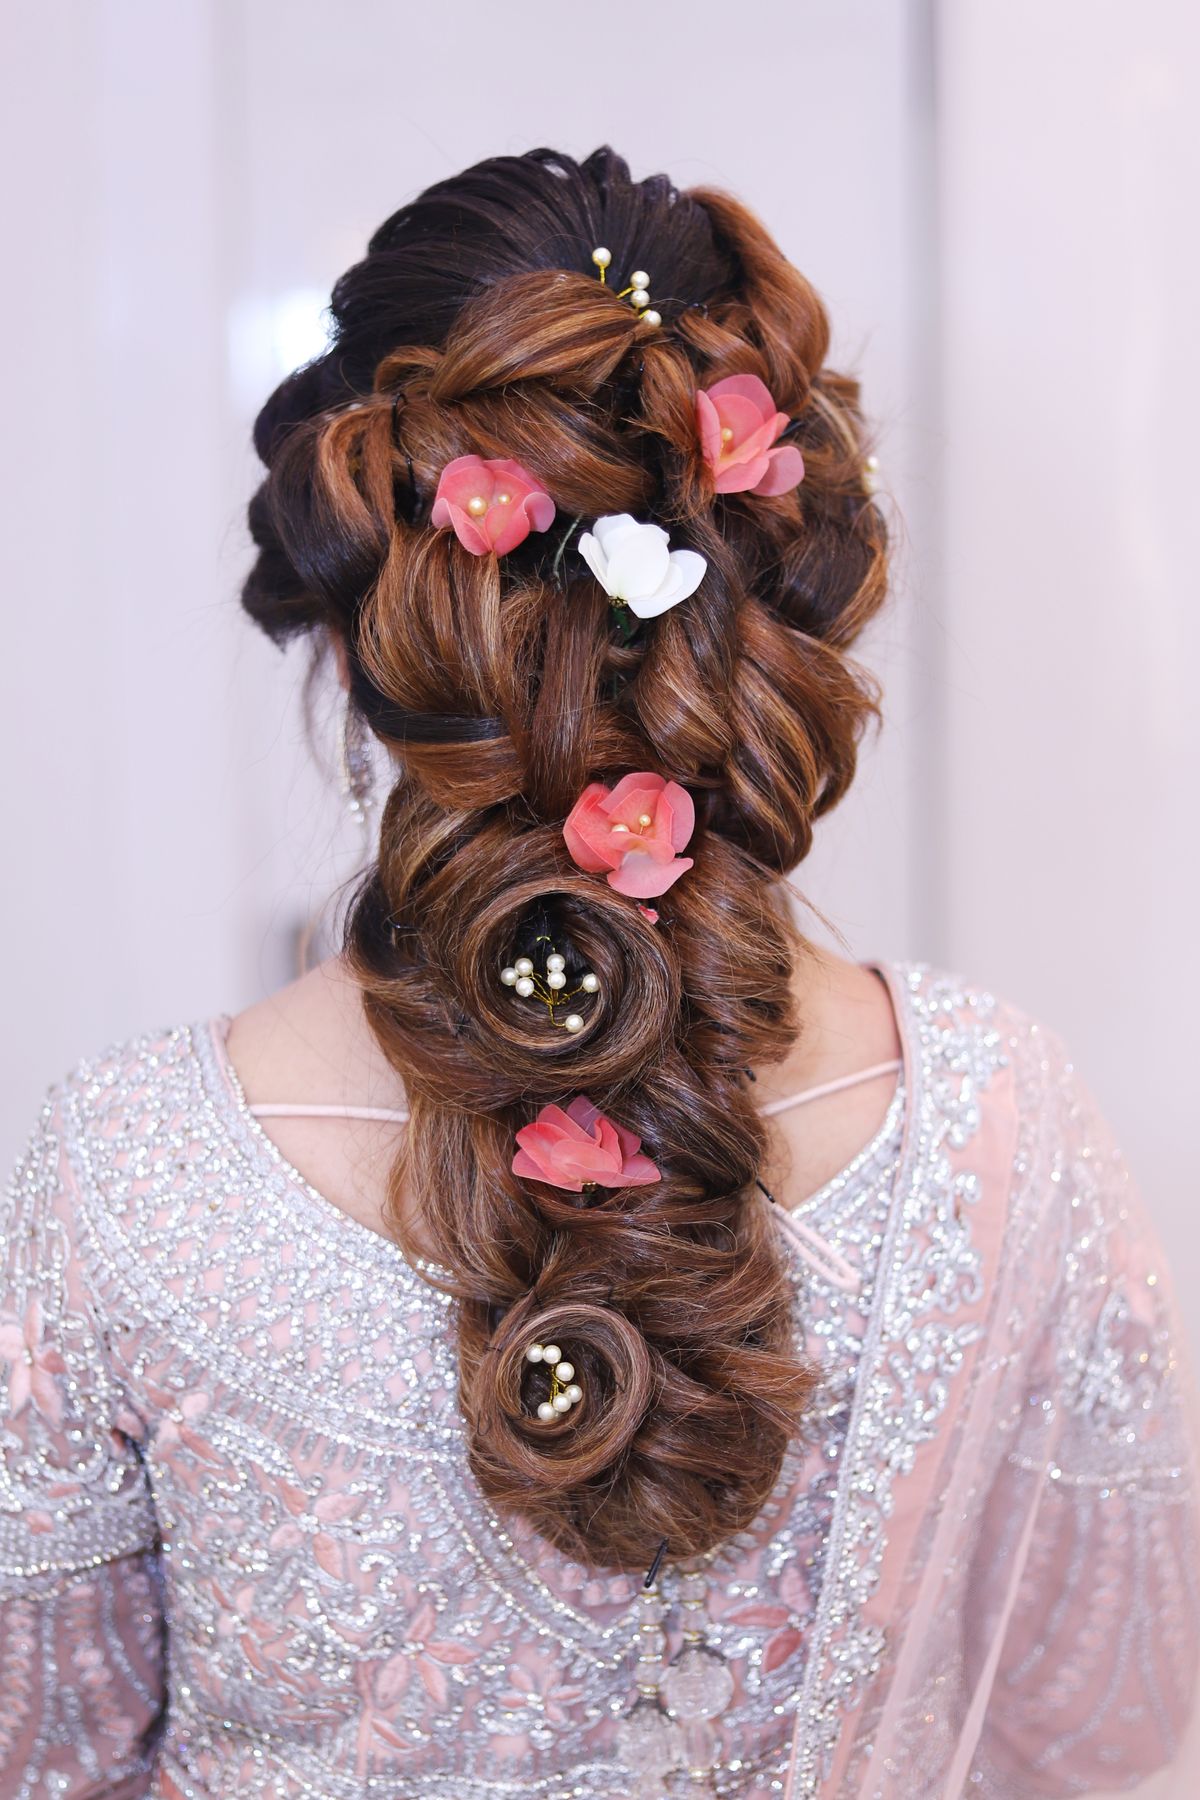
The loose floral braid is the dressy one. The braid is pulled apart for a bubbly, voluminous texture, then decorated with flowers and pins.
It takes patience and a few extra hands, but it looks romantic and is a good option for weddings, festivals and photos.
If you are doing this at home, braid loosely, then gently pull at the edges of each loop before adding your accessories.
Best for: weddings, parties and photos.
Time and upkeep: Takes about 45 minutes. Lots of pins and a light hairspray will hold it.
Styling tip: Use fresh flowers only on the day, and add them last so they stay fresh.
The part nobody mentions: keep braids comfortable
Braids are a great low maintenance option, but the American Academy of Dermatology warns that tight cornrows, braids and updos can cause traction alopecia, which is hair loss from repeated pulling. The hairline is often the first place it shows.
Its advice is practical: loosen braids, especially at the hairline, choose thicker braids if you can, and keep them shorter. It also says not to wear braids longer than 6 to 8 weeks, and to rotate your styles and give your hair breaks.
The AAD adds one line worth remembering: if your hairstyle feels painful, the style is too tight. Stop right away if you notice pain, scalp stinging or crusts, and see a board certified dermatologist if the signs continue.
Which braid for which situation
- You have 10 minutes: the classic three strand braid or the low single braid.
- You have a wedding or party: crown braids or the loose floral braid.
- You want a style for weeks: cornrows, twists or long braids from an experienced braider, kept loose and comfortable.
- You want something bold: colour braids, which let you try a new shade without dyeing your own hair.
- You want to protect your hair from heat: a simple braid overnight gives you soft waves with no tools.
How to care for braids so they look fresh
- Moisturise the scalp: a light oil or leave in spray on the scalp keeps it comfortable.
- Protect at night: wrap your braids in a silk or satin scarf or use a satin pillowcase.
- Wash gently: use a diluted shampoo on the scalp, and rinse well.
- Do not leave them too long: take them out within the recommended time, following the AAD guidance of 6 to 8 weeks at the most.
- Give your hair a break: wear a looser style between long term braids.
What to say to your braider
“I would like [style] and I want it comfortable, not tight, especially at my hairline. Could you use lightweight extensions, and tell me how long I should keep it in?”
A good braider will welcome this. If someone ignores it, or says tightness is normal, find another braider.
Braid mistakes to avoid
- Braiding too tight: it hurts, and it can damage the hairline.
- Skipping scalp care: a dry scalp is itchy, and it is no fun under a braid.
- Keeping them too long: old braids tangle and can pull on the roots.
- Using heavy products: they weigh down the braids and cause buildup.
- Forgetting the ends: trim and moisturise them after you take braids out.
Want to see more ideas for colder months? Our guide to winter braided hairstyles covers cosy options, and our updo hairstyles are good to pair with a braid.
How to do the classic braid, step by step
- Brush your hair well and gather it at the back, or leave it down for a side braid.
- Split it into three equal sections: left, middle and right.
- Cross the right section over the middle, so it becomes the new middle.
- Cross the left section over the new middle.
- Keep repeating, pulling gently so the braid stays even.
- Secure the end with a soft tie, then pull the sides apart a little for fullness.
Once your hands know this rhythm, every other braid on this list becomes easier. Practise in front of a mirror first, then try it by feel.
Braids for different hair types
- Fine hair: keep braids small and loose, and add texture spray for grip. Larger braids can look thin.
- Thick hair: split into more sections for neat, manageable braids, and use a larger tie.
- Curly and coily hair: braid on stretched, moisturised hair for neat lines, and be gentle at the roots.
- Straight, slippery hair: use a little texture spray or braid on day old hair for extra grip.
Choosing extensions without regret
If you are adding extension hair for braids or twists, think about weight first. Lighter hair is more comfortable and puts less strain on your scalp.
Next, think about colour. A shade close to your natural colour is easiest to live with, while a bold colour is more of a short term fun choice. Ask your braider to show you samples in daylight before you decide.
Finally, plan the removal. Set a date in your calendar when you book, so you take them out on time, rather than keeping them too long.
Braids vs twists: what is the difference?
A braid weaves three or more sections over and under each other, while a twist wraps two sections around each other. Braids tend to look flatter and more structured, and twists look rounder and more textured.
Both can be worn loose, pinned up or finished with beads and wraps, and both need the same care: comfortable tension, a moisturised scalp and a removal date. Pick the one whose look you like best.
If you are unsure, ask your braider to show you photos of their previous work on hair like yours. It is the quickest way to see if their style matches what you have in mind.
A simple weekly braid routine
- Sunday: wash and condition, and braid damp hair loosely for waves.
- Monday to Wednesday: wear a low single braid for work.
- Thursday: try the loose floral braid or crown braids for plans.
- Friday: take the braid out, brush gently and let your hair rest.
- Saturday: leave your hair loose, with a light oil on the ends.
This routine gives your hair variety without tight, long term styles, and it is a good way to practise the beginner braids before trying the more advanced ones.
Save this: braid types cheat sheet
Screenshot it, print it or keep it on your phone. It has the key details from this guide in one place.
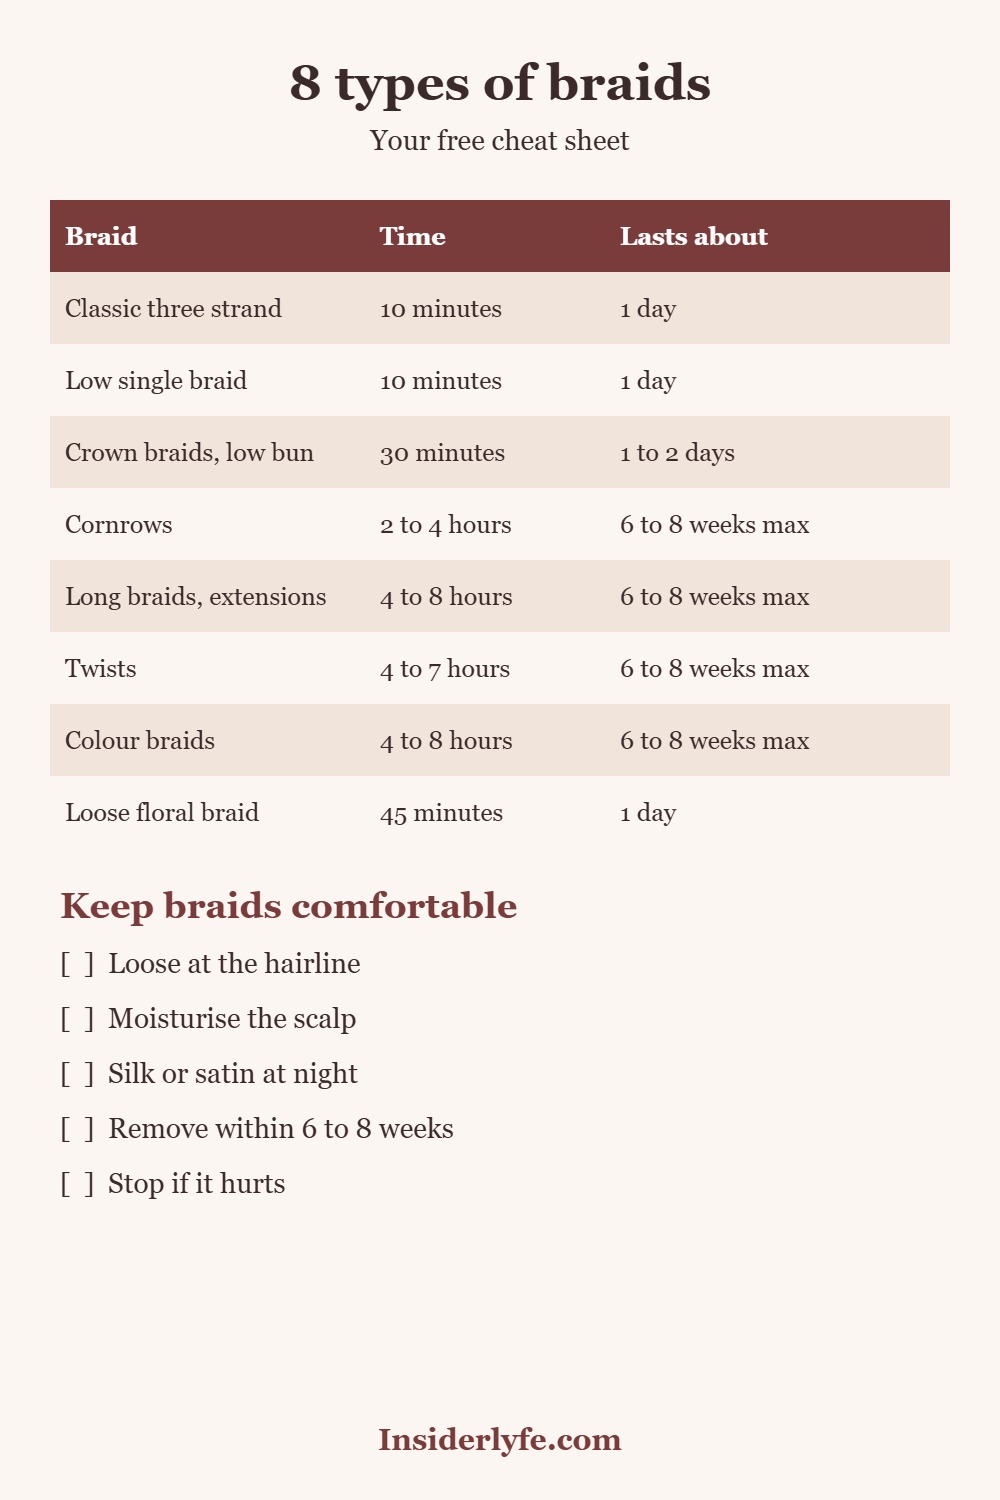
Download the full-size chart (free, no email needed)
Frequently asked questions
How long can I keep braids in?
The AAD advises not wearing braids longer than 6 to 8 weeks. Check with your braider for your hair type and style.
Do braids cause hair loss?
Tight braids can cause traction alopecia, according to the AAD. Keep them loose, especially at the hairline, and stop if you feel pain.
What is the easiest braid for beginners?
The classic three strand braid. Practise on damp, brushed hair and keep it loose.
Can I braid short hair?
Yes, if it is long enough to grip, about shoulder length is a good start. Smaller braids and cornrows work well for shorter lengths.
How do I stop frizz in braids?
Use a light oil, cover your braids at night with silk or satin, and avoid touching them too much.
Final thoughts
Pick a braid that fits your week. A simple one for work, a special one for plans, and a longer lasting one only if you will care for it. Keep everything comfortable, and your hair will thank you.
Which braid are you trying first, and which one do you wish you could do? Tell us in the comments.
Related Post